Step 1: Login to Payex’s portal #
Log on to our portal at https://portal.payex.io/Home, and key-in your credentials.
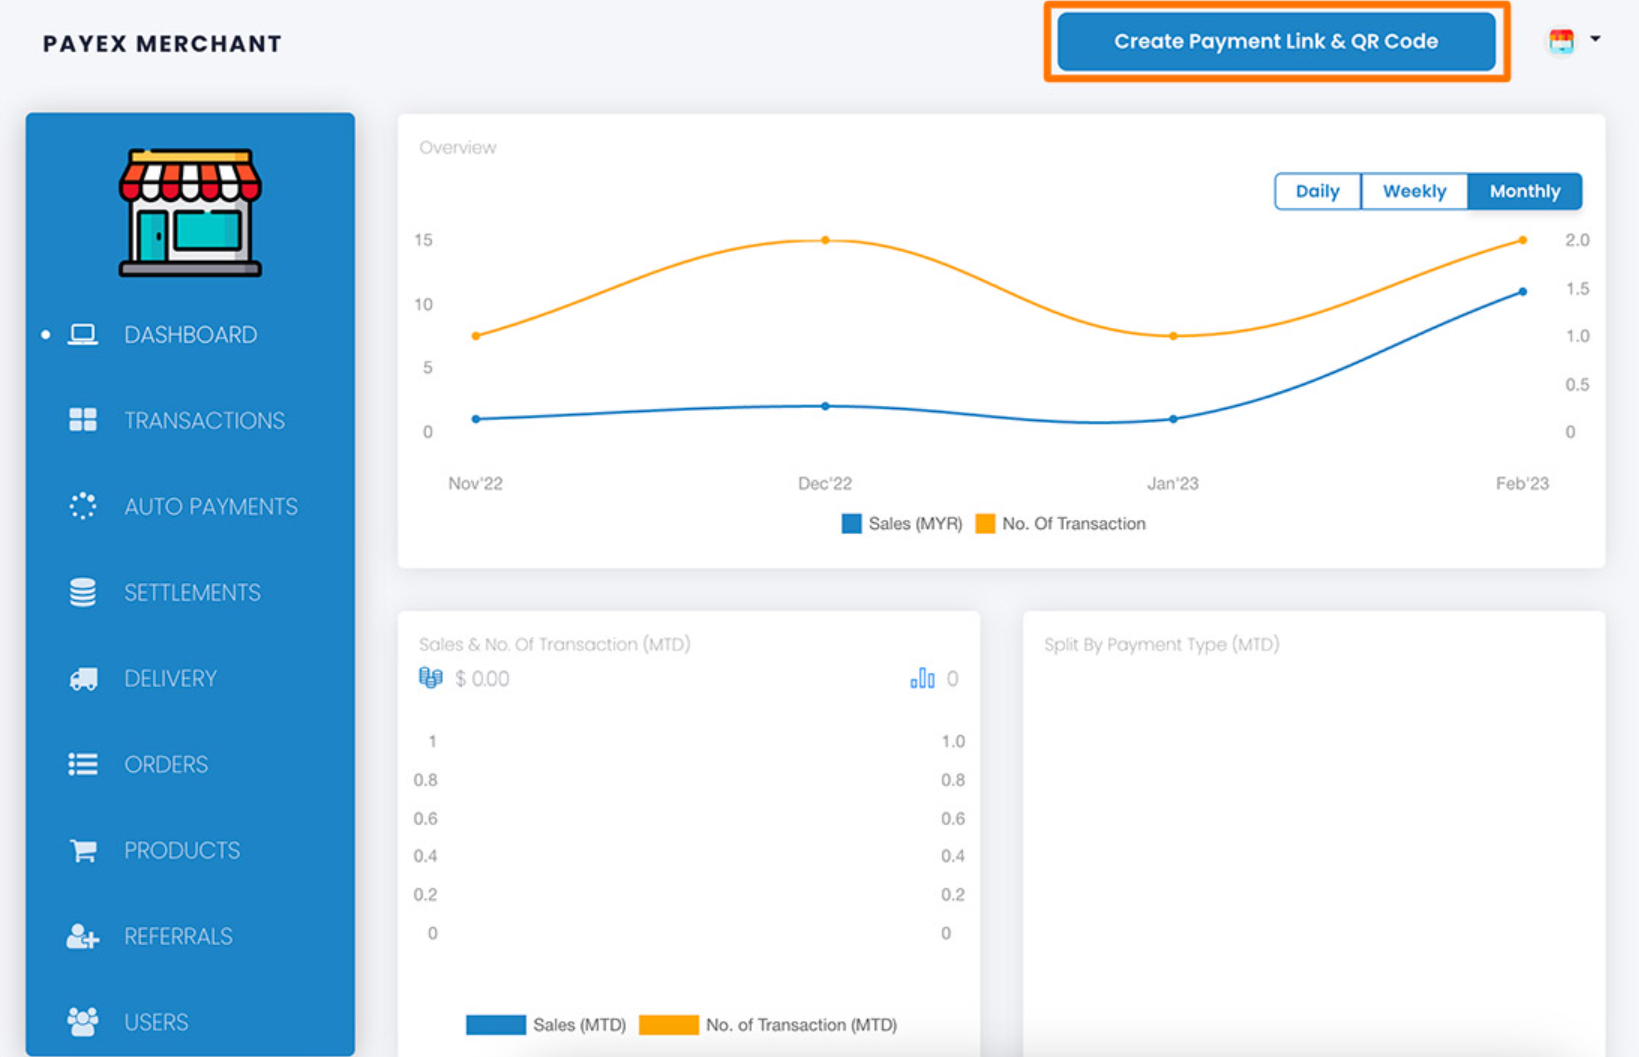
Step 2: Create pre-auth payment link & QR code #
Click the “Create Payment Link & QR Code” button on the top of the page once you’re logged in.
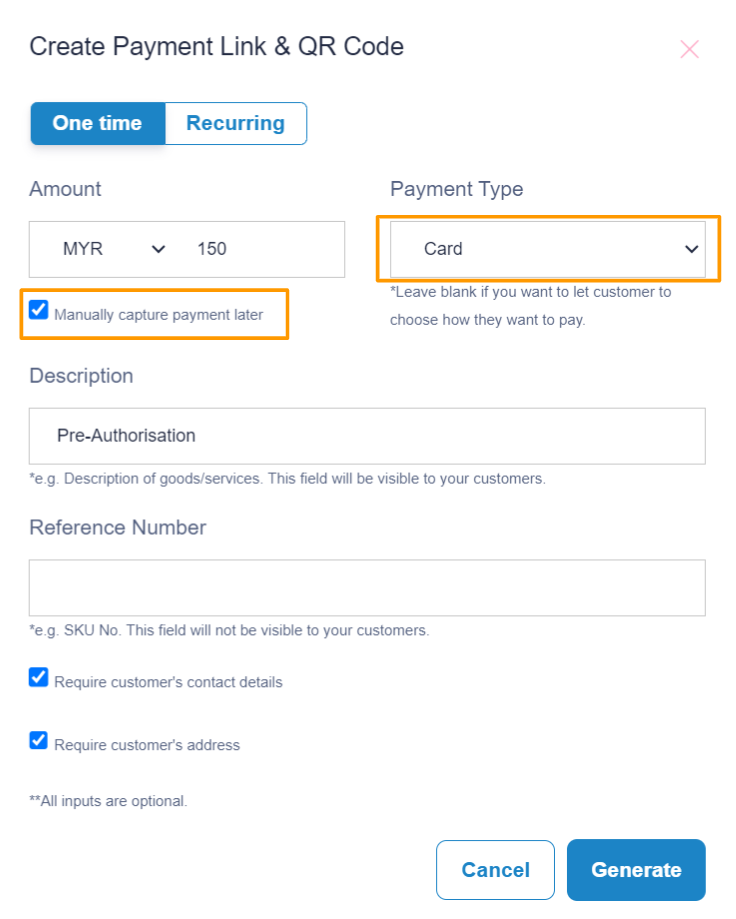
Step 3: Fill out pre-auth payment details #
To create a payment link with the pre-auth amount set by you, simply fill in all relevant fields as below.
❗Note: Make sure to check the box for “Manually capture payment later” & select payment type as “Card“
- Uncheck the box for “Require customer’s contact details” if you do not require customer’s details.
- Uncheck the box for “Require customer’s address” if you do not require customer’s address.
Click the “Generate” button to generate the payment link & QR code.
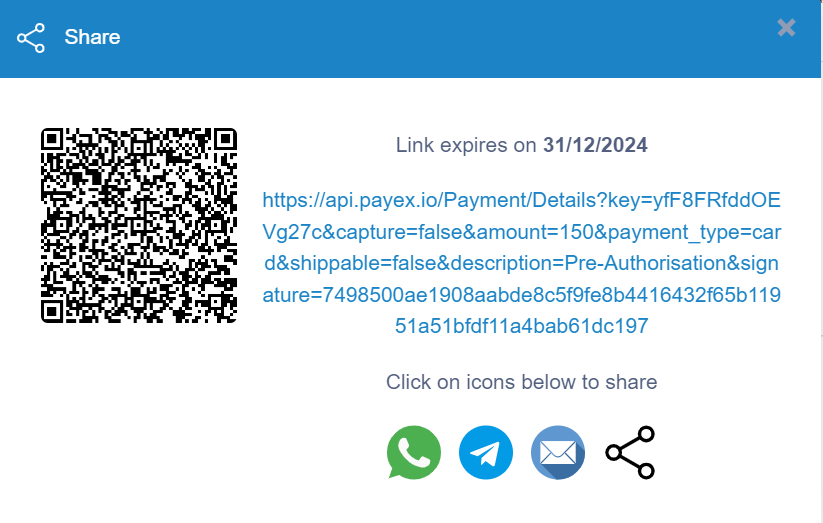
Step 5: Save & share pre-auth payment link & QR code #
Copy the payment link or right click the QR code to save or share to your customers.
❗Note:
1. The expiry date of your payment link. All payment links are valid for 1 year from the date of creation.
2. We do not store payment links & QR codes. Please re-generate a new link if you lost yours.
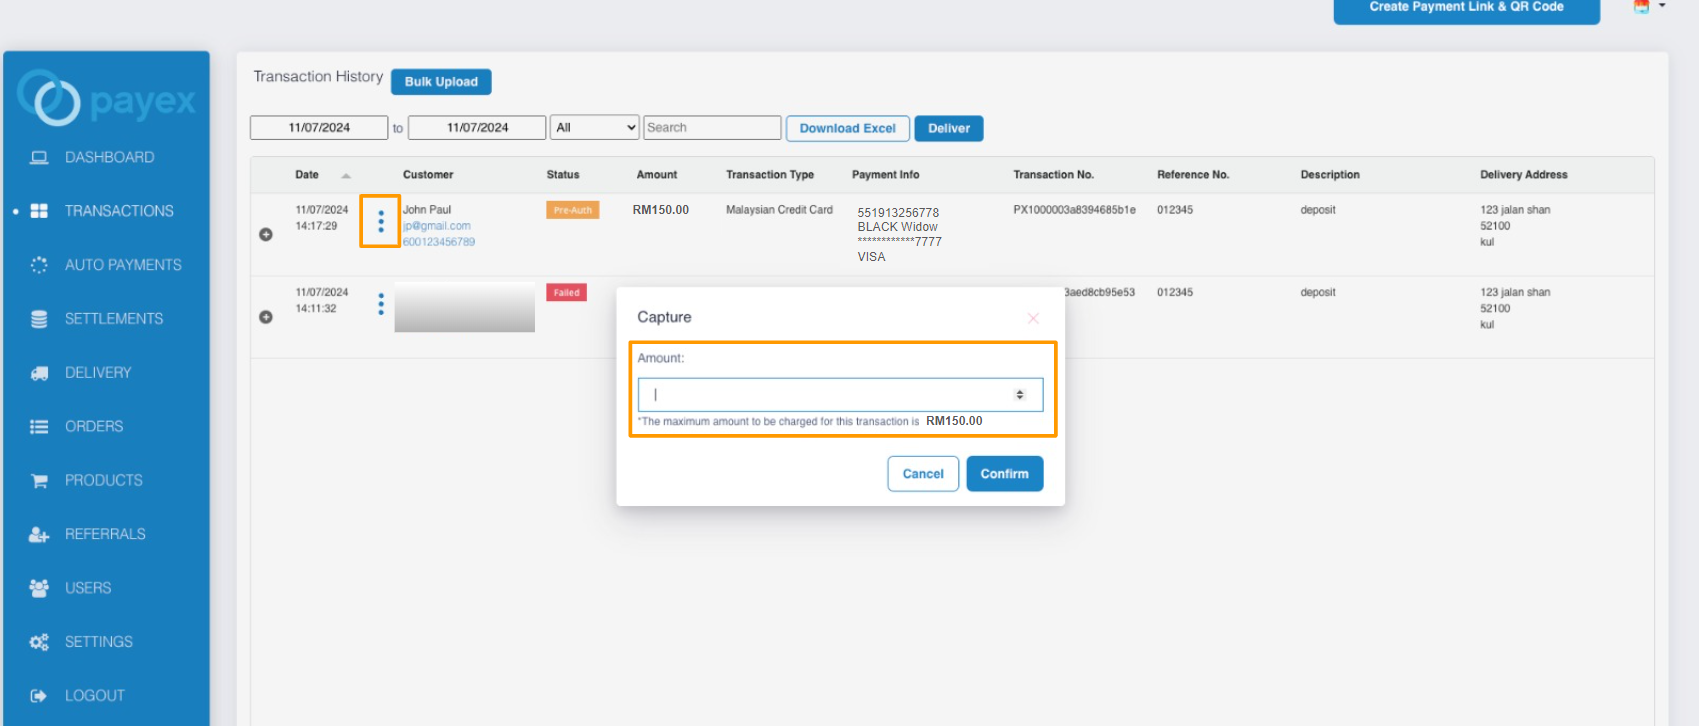
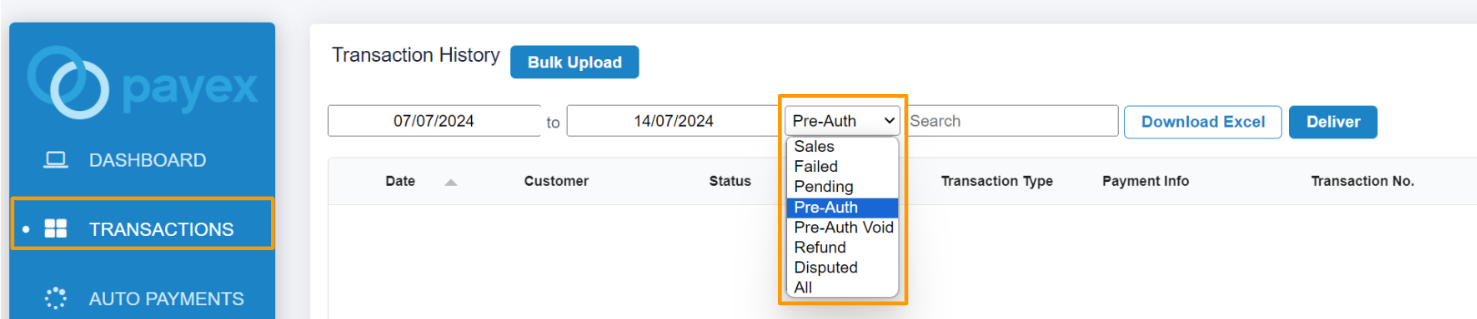
Step 6: How to check your Pre-Auth Transaction Status #
Filter to view status of “Pre-Auth” transactions.
- The “Pre-Auth” status means your customer has successfully completed the pre-authorization process using the payment link you shared.
Step 7: How to charge my customer within the pre-auth duration #
To charge your customer, click the 3-dot icon > select “Capture” > enter the amount you wish to charge > click “Confirm“.
❗Note:
1. The maximum pre-auth duration is 7 days.
2. The maximum amount you can charge your customer cannot exceed the pre-authorized amount. For example, if the pre-authorization was for RM150.00, that’s the most you can charge.
3. If the payment isn’t captured, the pre-authorized amount will be released automatically, typically after 7 days. However, the exact timing for the funds to be returned to your customer’s card depends on their bank and might take a bit longer.
To void the pre-auth transaction, click on the 3-dot icon and select “Void.” Once you’ve voided it, the transaction status will change from “Pre-Auth” to “Pre-Auth Void“