Table of Contents
- Step 1: Login to Payex’s portal
- Step 2: Create products
- Step 3: Add new products
- Step 4: Fill out product info
- Step 5: Add option (if any)
- Step 6: Configure your shipping / pick up
- Step 7: Fill out relevant information
- Step 8: Save your configurations
- Step 9: Add product into shopping cart
- Step 10: Add new / edit shopping cart
- Step 11: Share shopping cart URL to your customer
- Step 12: Check your order
Step 1: Login to Payex’s portal #
- Log on to our portal at https://portal.payex.io/Home, and key-in your credentials.
Step 2: Create products #
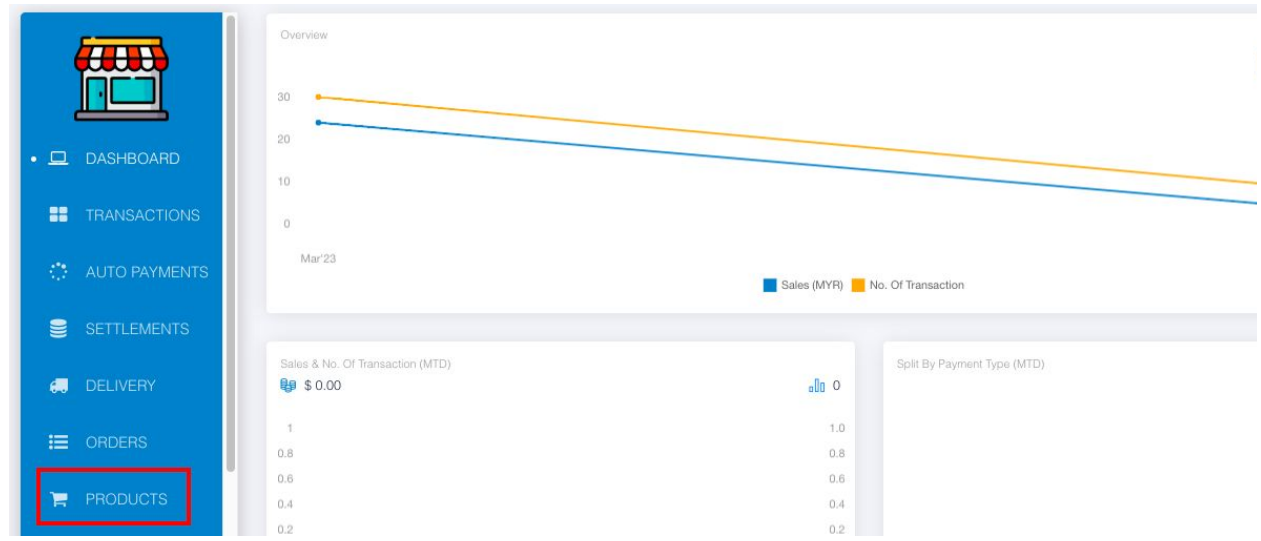
- Click “Products”
Step 3: Add new products #
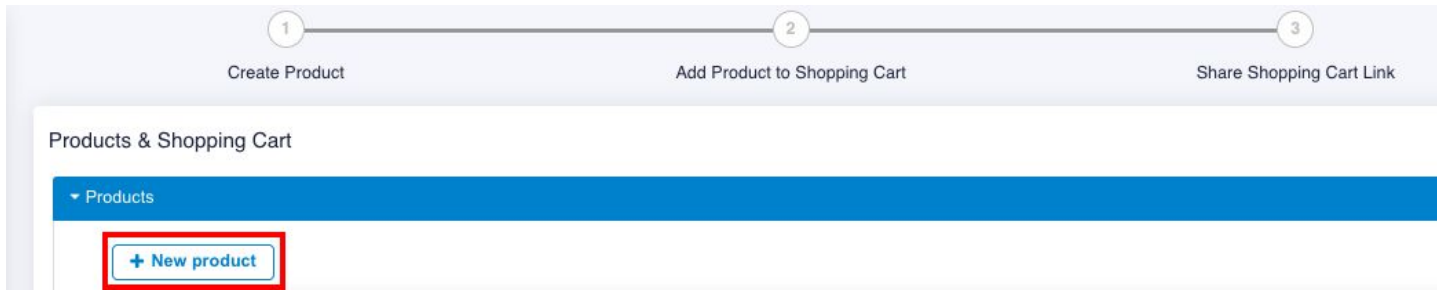
- Click “+ New product”
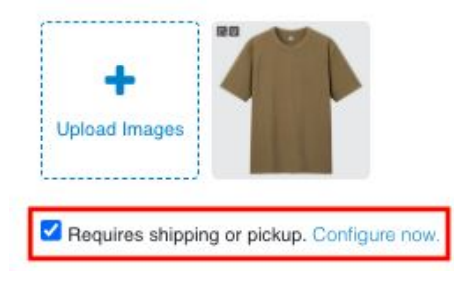
Step 4: Fill out product info #
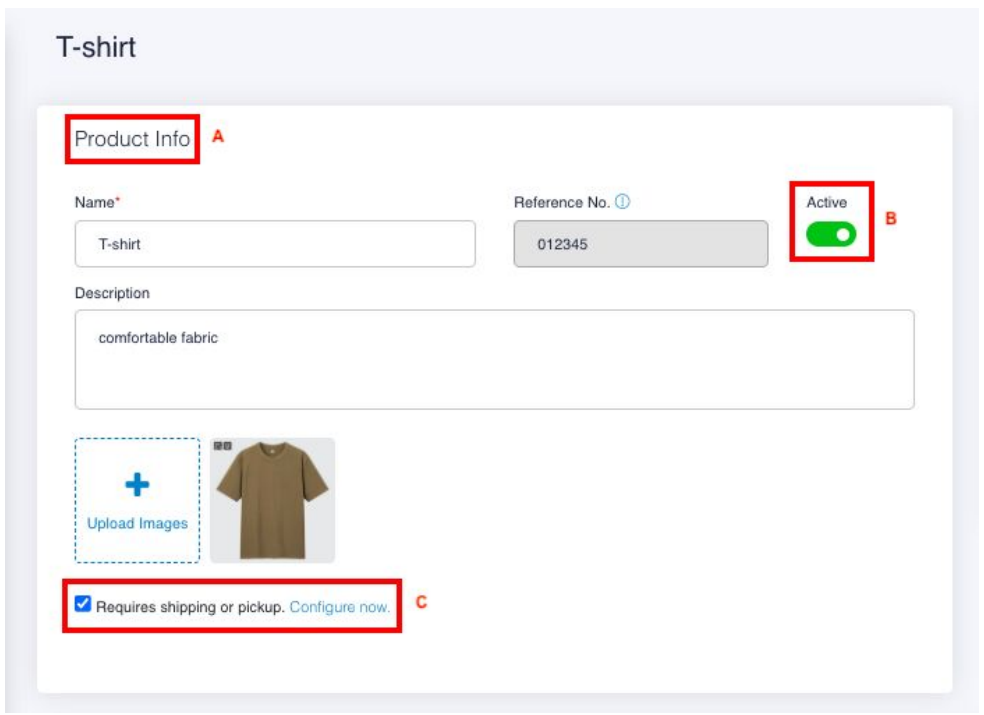
A – fill out “Product Info”
B – toggle right the button to “Active”
C – check the box if product requires shipping or pick up, please refer to Step 6 for more information
! The system does not allow you to remove / delete created product, so you can toggle left the button if you do not want your product to be displayed in shopping cart
Step 5: Add option (if any) #
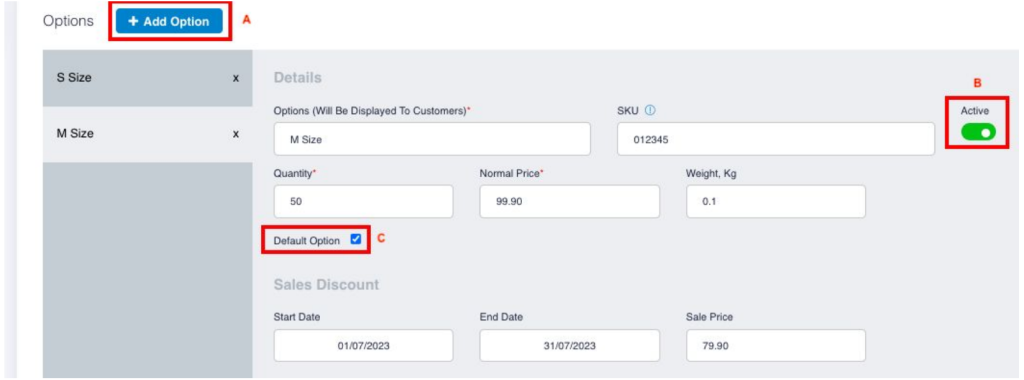
A – click “Add Option”
B – toggle right the button to “Active”
C – check the “Default Option” if you would like to display this option as the default option
Step 6: Configure your shipping / pick up #
- Click “Configure now“
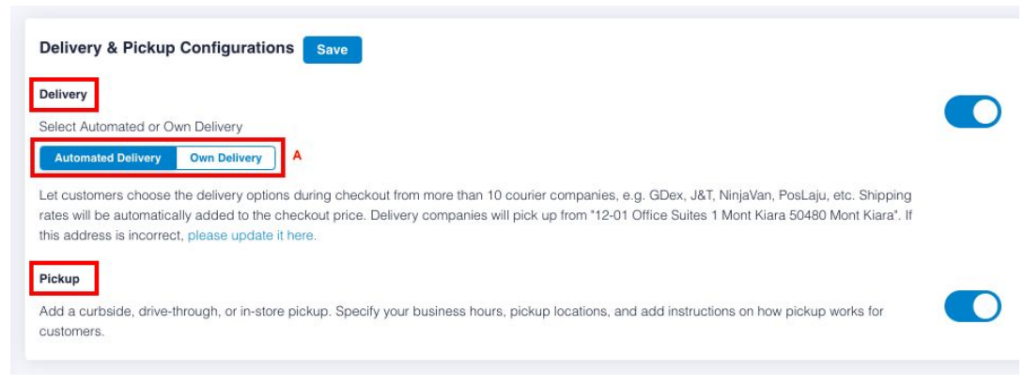
- Will navigate you to Delivery & Pickup Configuration
- Toggle the relevant button if you would like to arrange deliver / pickup (you can enable both as well)
- A – please choose either Automated Delivery or Own Delivery
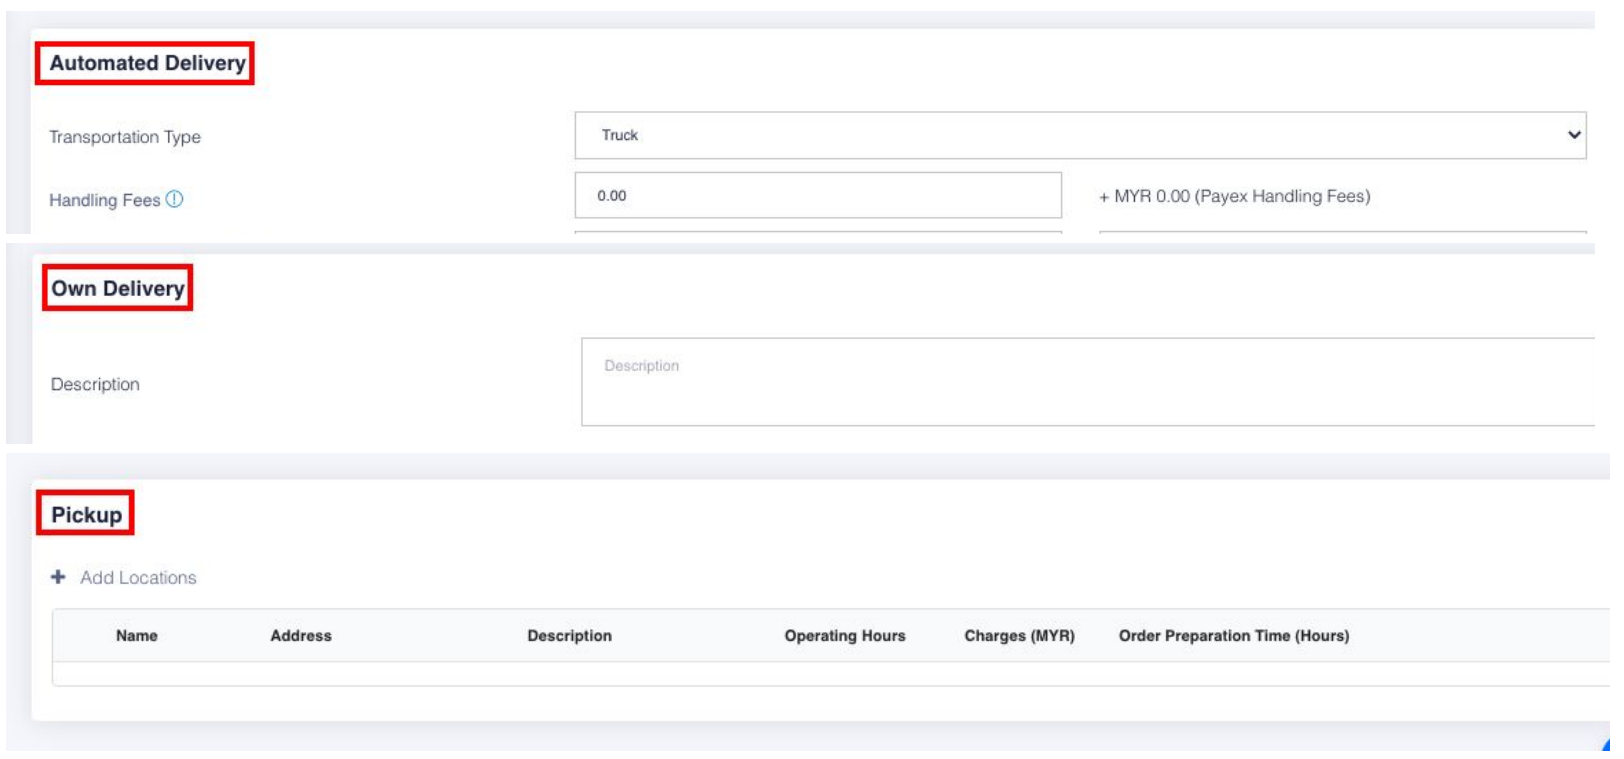
Step 7: Fill out relevant information #
Step 8: Save your configurations #

- Click “Save“
Step 9: Add product into shopping cart #
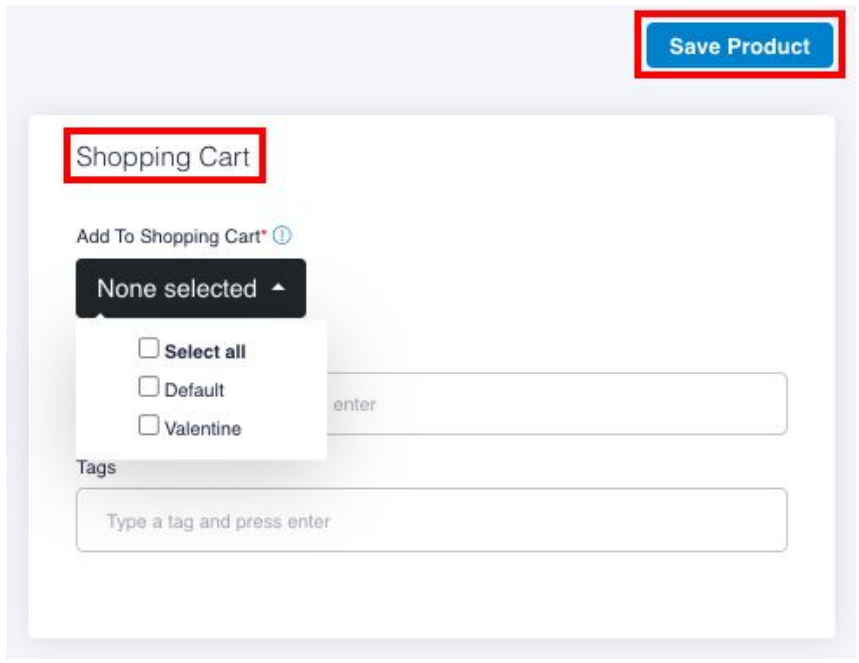
- Add your product into shopping cart by selecting the relevant category
- Click “Save Product”
Step 10: Add new / edit shopping cart #
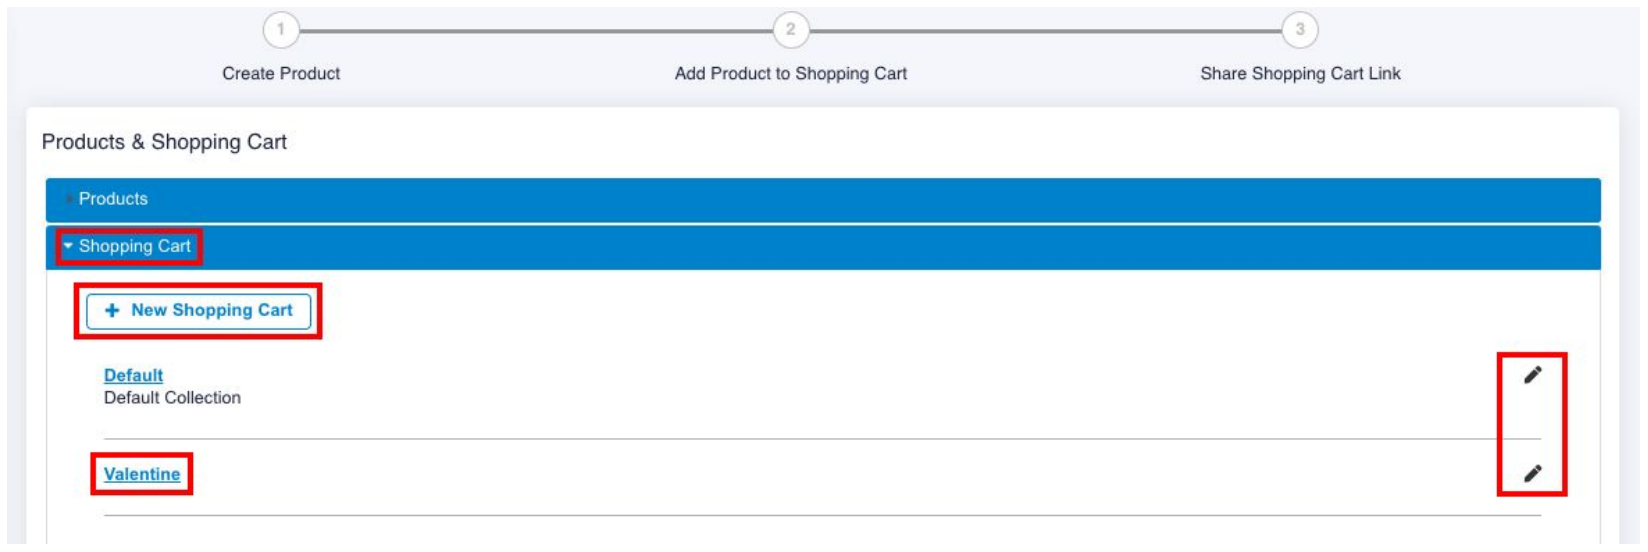
- You can add new / edit your shopping cart whenever you want
- Click “Valentine” to view your product
Step 11: Share shopping cart URL to your customer #
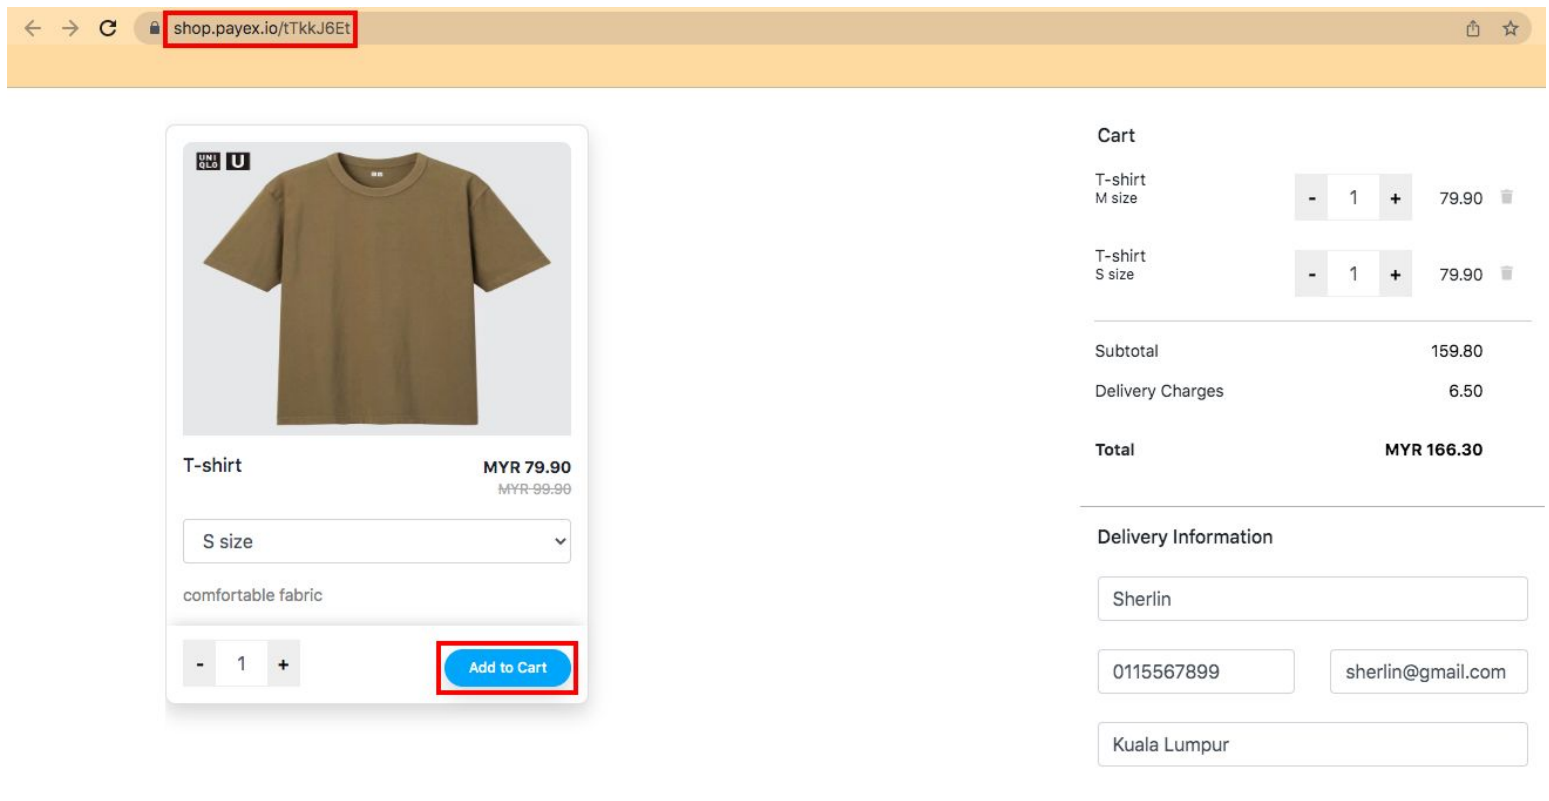
- Copy the URL and share it to your customer
- Your customer clicks “Add to Cart”, fill out the delivery information, choose delivery / pick up (if applicable) and proceed to checkout
Step 12: Check your order #
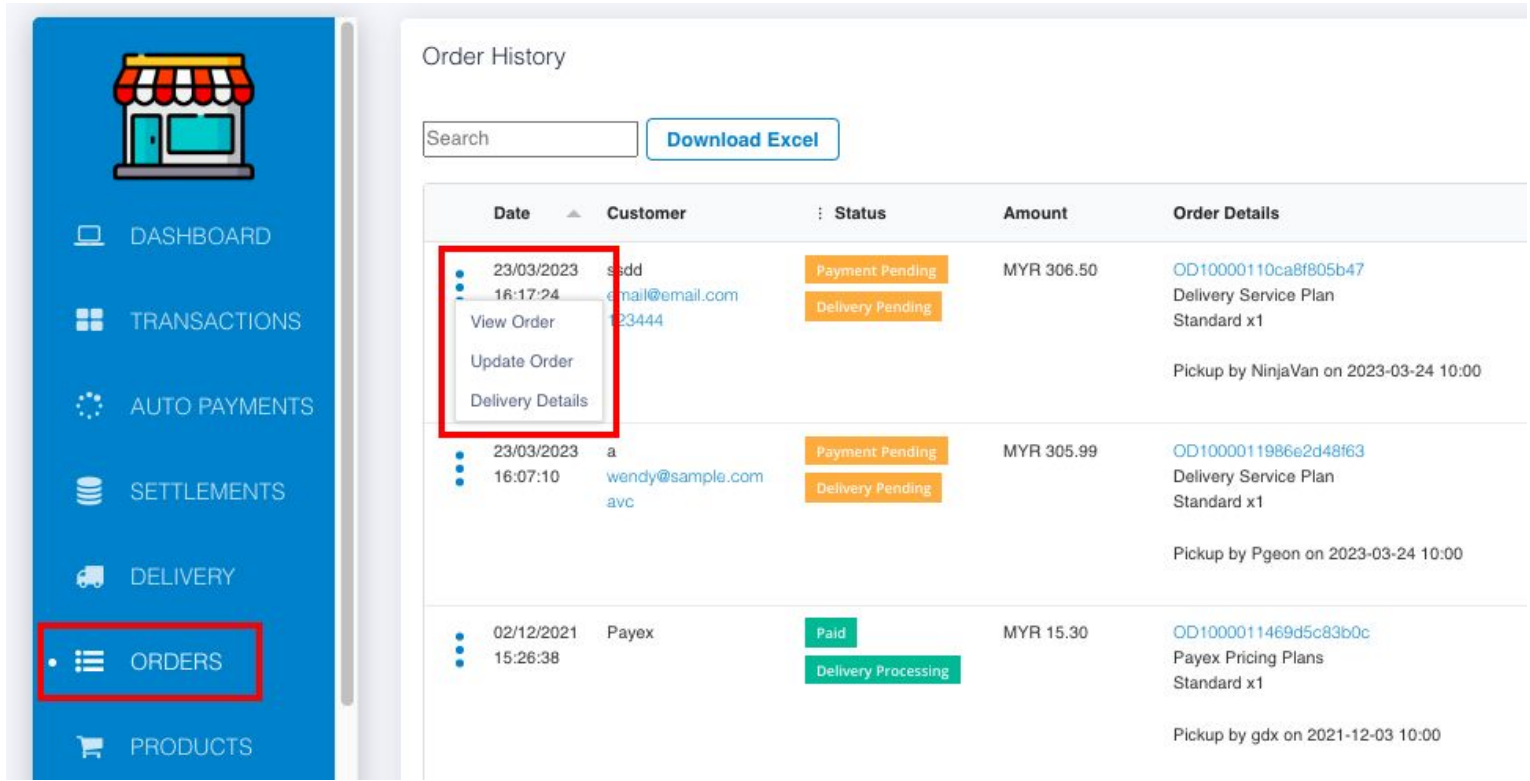
- Click “Order” to view your order status made from shopping cart
- You can click to view your order / update order / delivery details


