Table of Contents
Use case #1: You want to collect a non-fixed amount from customer every month where collection is based on customer's usage. Sometimes if amount is higher for a specific period then more than one collection is needed in that month.

Use case #2: You want to collect a lower or higher amount for a specific month only. See more here.

Use case #3: You fail to collect from customer for a specific month and want to manually collect.
Step 1: Login to Payex’s portal #
Log on to our portal at https://portal.payex.io/Home, and key-in your credentials.
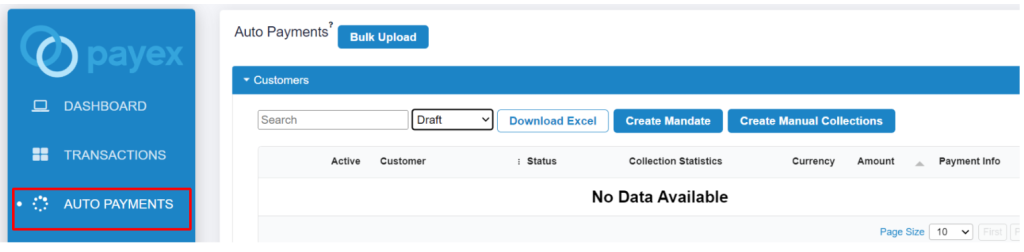
Step 2: Click “Auto Payments” on the left panel #
Step 3: Select the customer for manual collection #
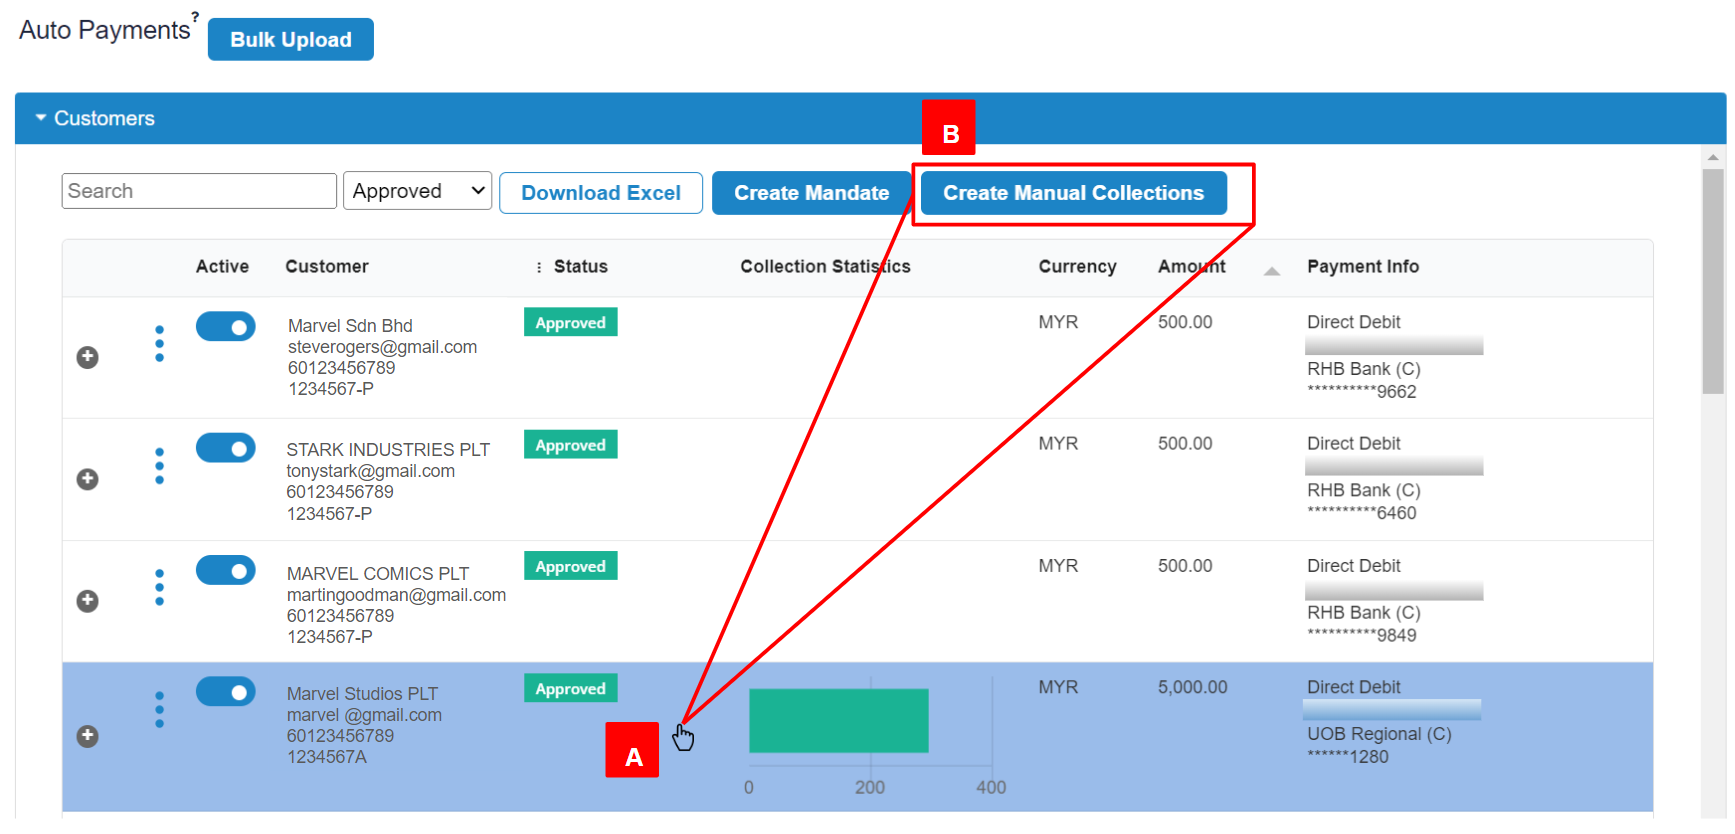
- A: Click the relevant customer until the row is “highlighted in blue“. You may also select multiple rows at a time by clicking multiple customers and you will notice both rows are “highlighted in blue“.
- B: Click “Create Manual Collections”
Step 4: Fill out the collection details of your customers #
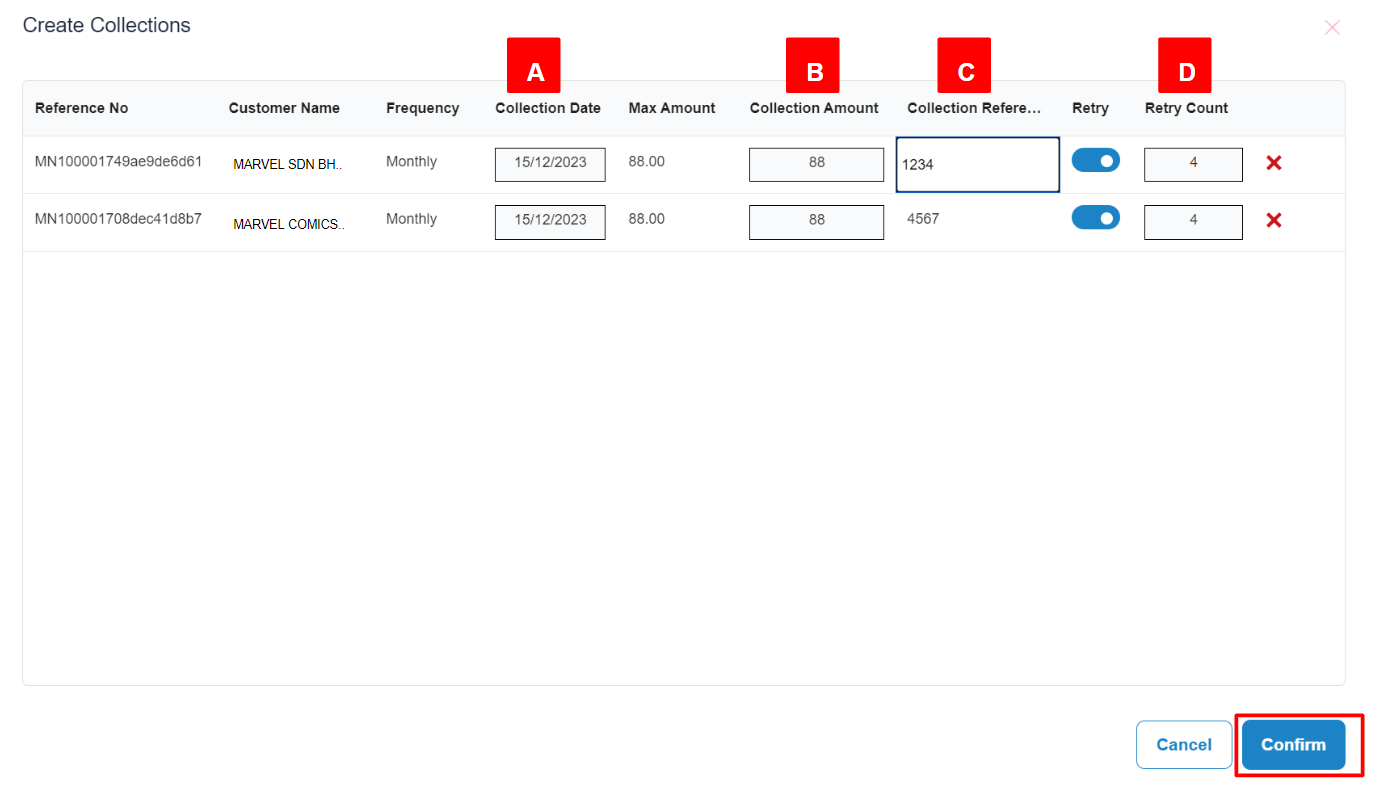
- A: Collection Date – Effective Date or the date merchant wants to collect the payment
- B: Collection Amount – Amount you want to charge your customer
- C: Collection Reference – Optional reference number
- D: Retry Count – Optional retry counts, you may toggle left to disable. Max is 4 retry counts for system to retry if fail to collect.
Click “Confirm” to generate the manual collection link.
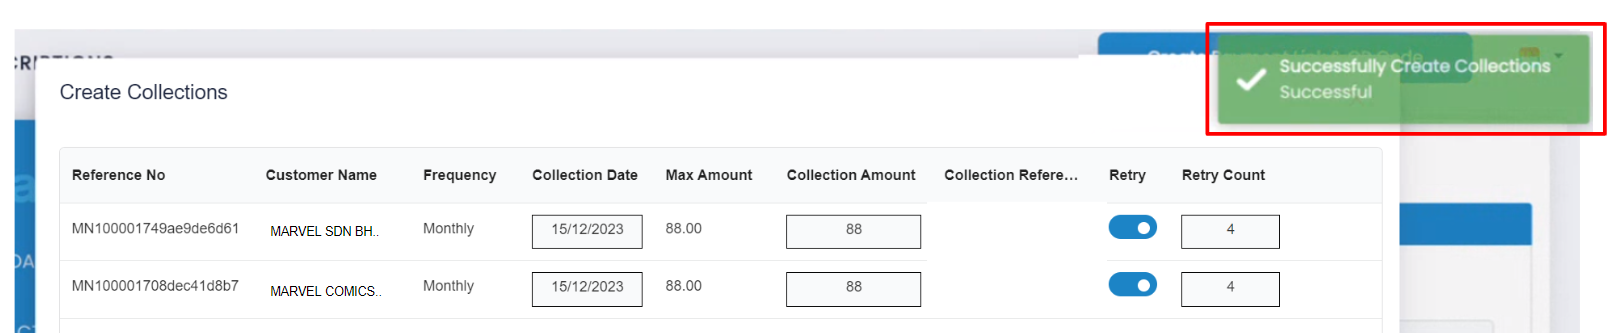
- You will receive a pop up notification in green “Successfully Create Collections Successful“
Step 5: View Collection Schedule #
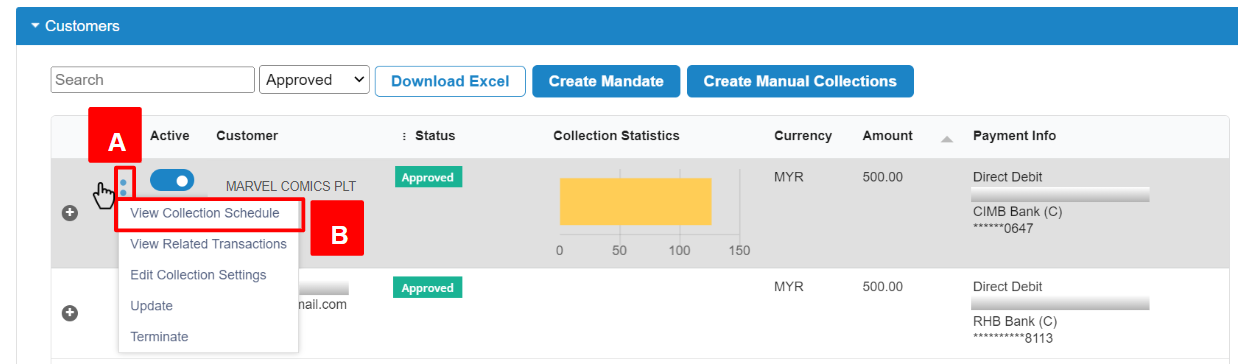
- A: Click the customer with manual collection created
- B: Click the 3-dots button and click “View Collection Scheduled“
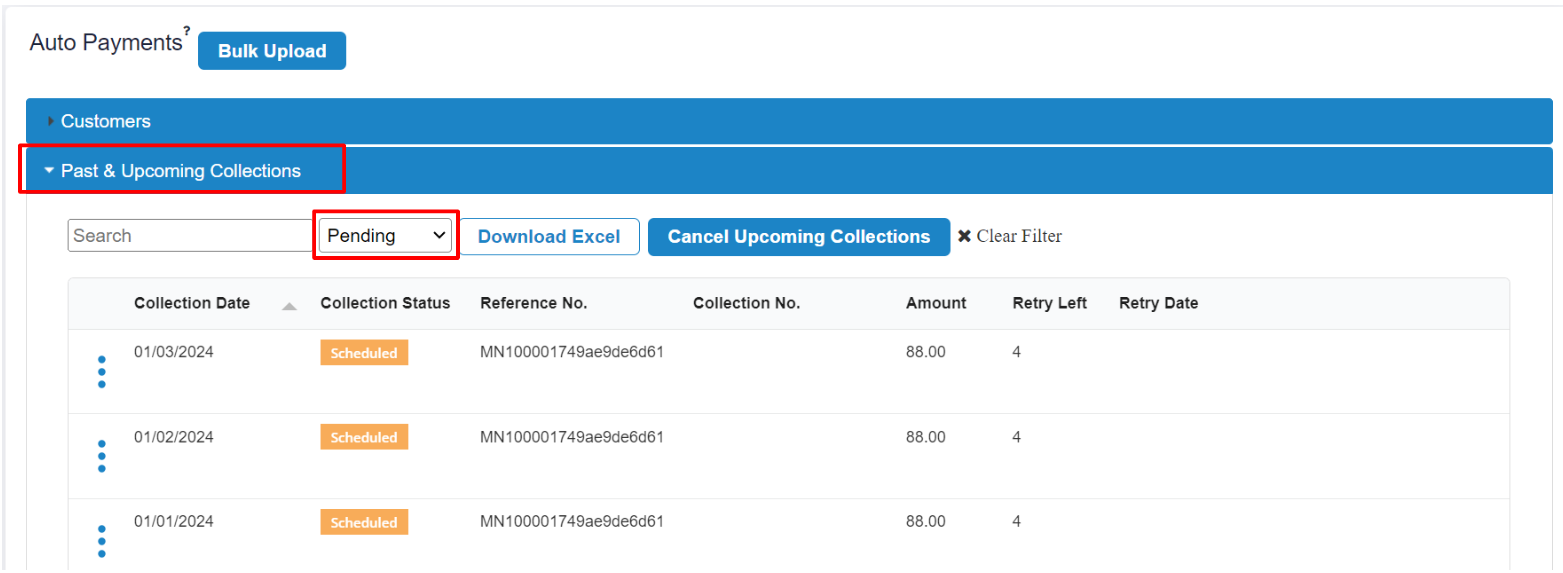
- You will be directed to a list of transactions under “Past & Upcoming Collections“
- Change the filter to “Pending“
- You will see the Collection Status of the manually created mandate under “Scheduled‘
Step 6: Manually retry collection #
Note: This is useful if auto retry was not set when the mandate link was generated previously.
Option 1: Retry collection #
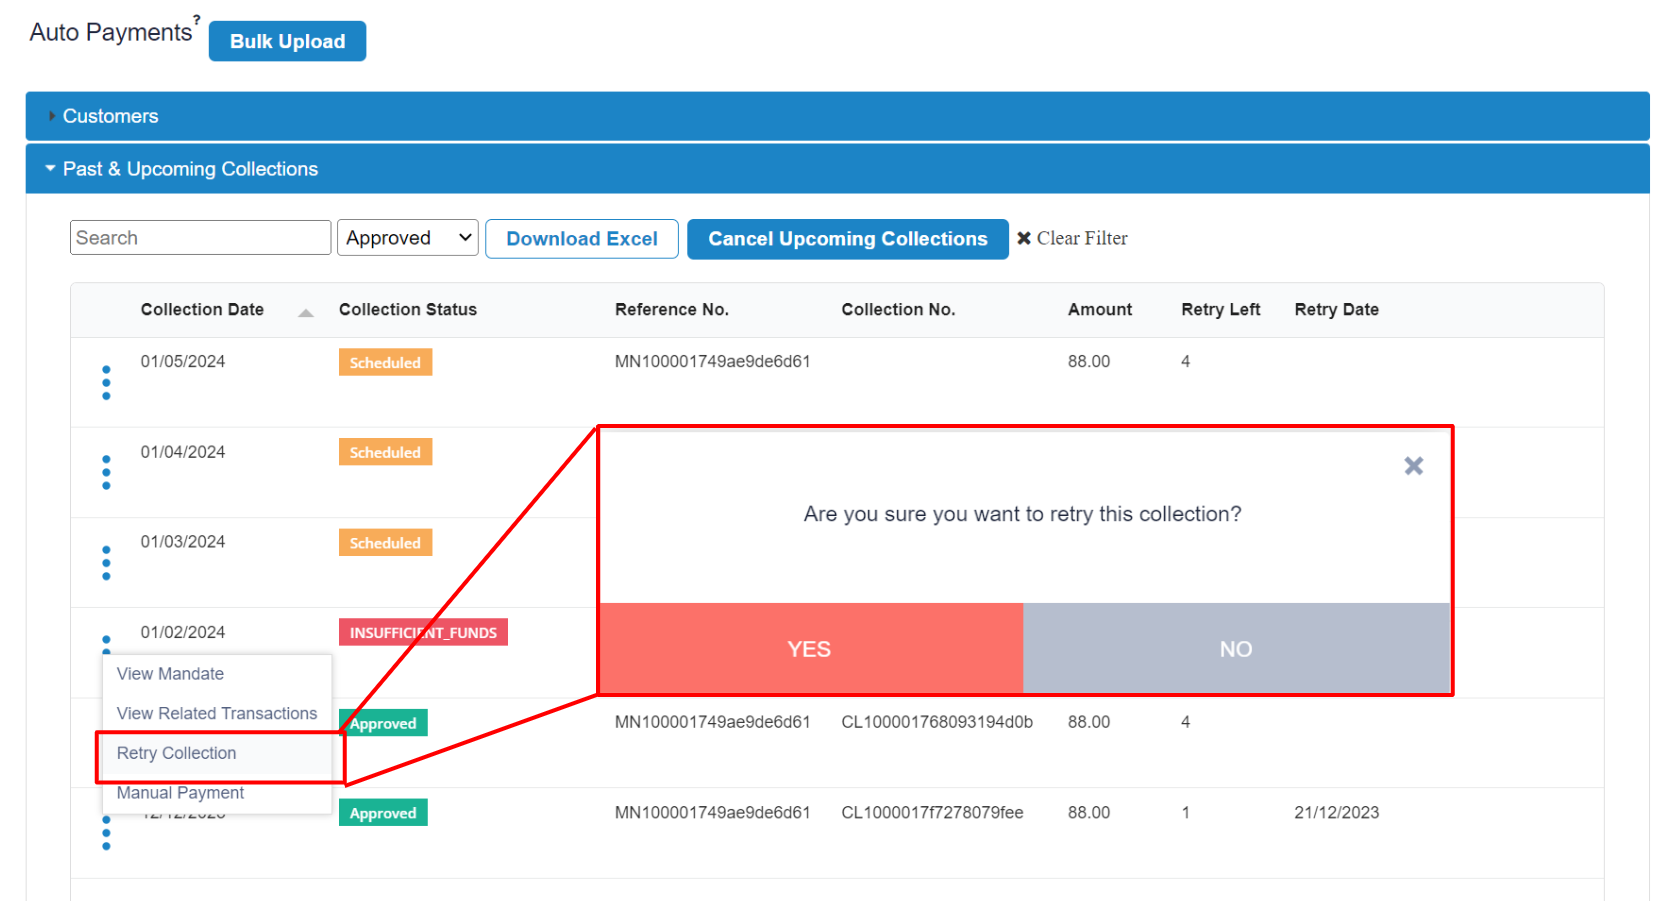
- Click the 3-dots button and click “Retry Collection“
- Click “Yes” and the collection will be scheduled for retry
Option 2: Manual payment #
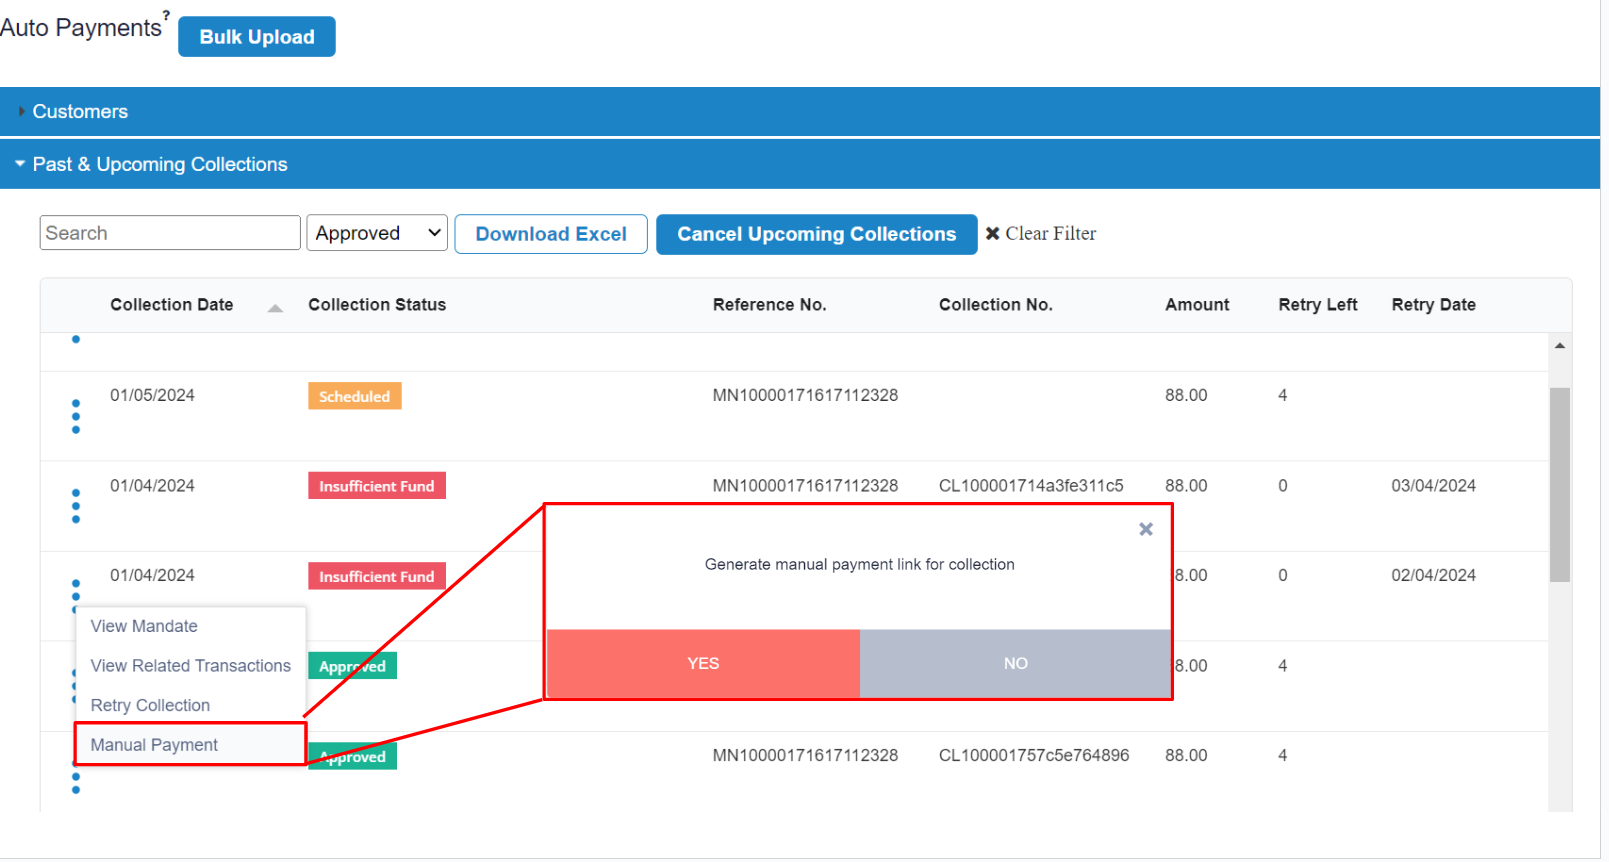
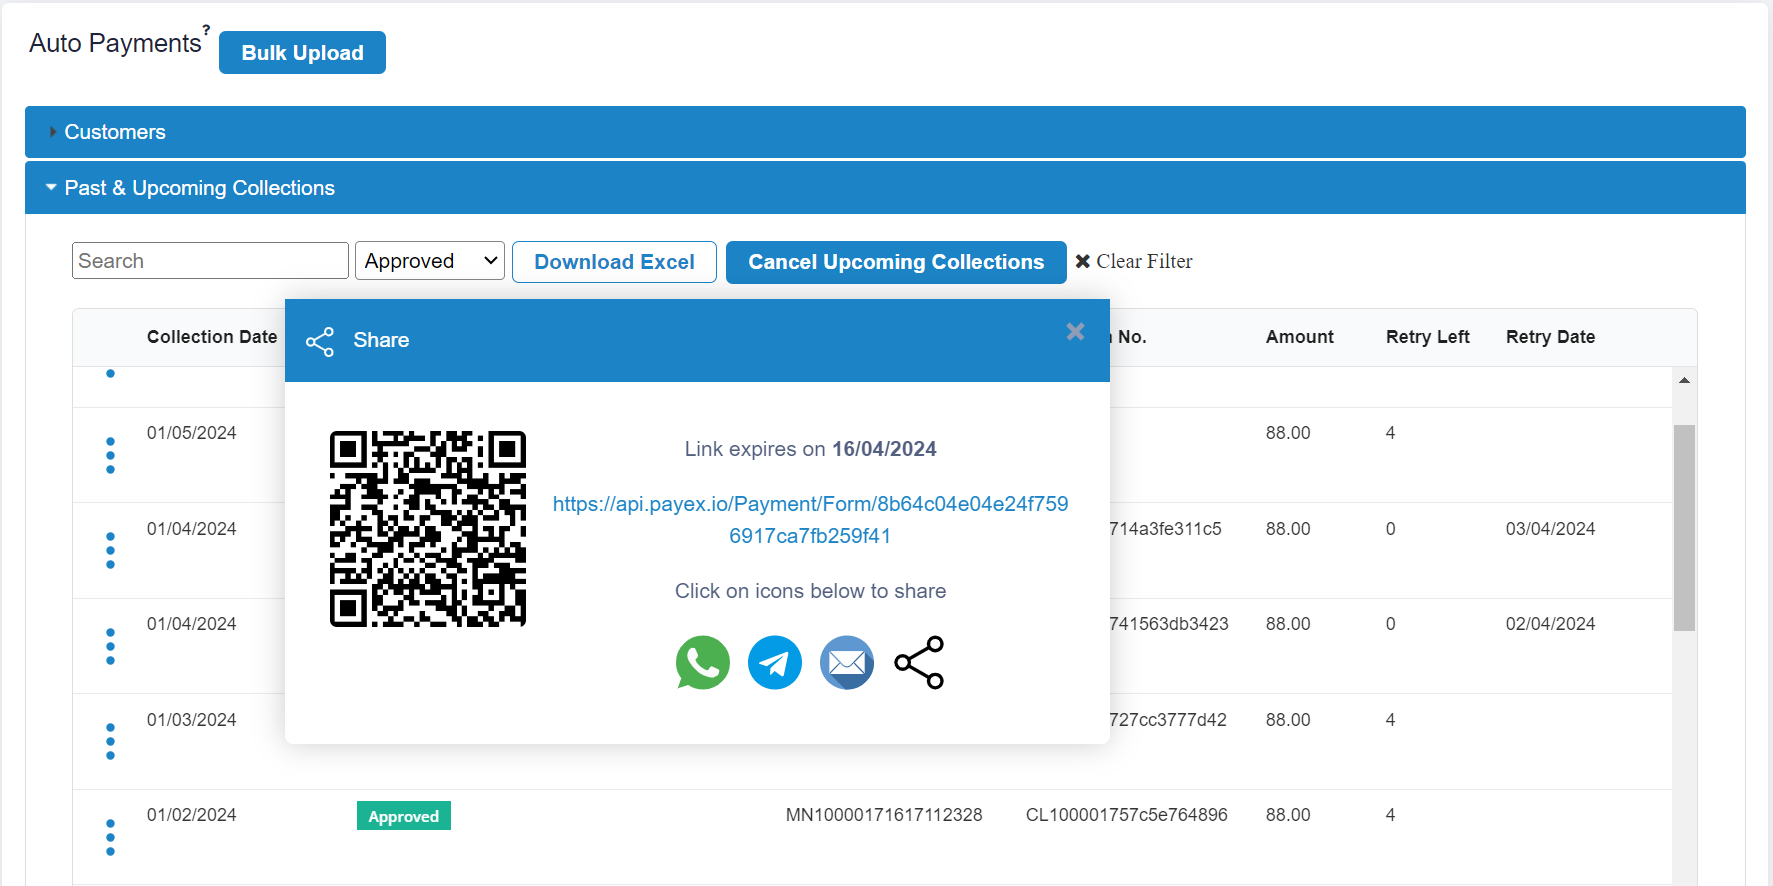
- Click the 3-dots button and click “Manual Payment“
- Click “Yes” and the payment link/QR for collection will be auto-generated to be shared with your customer.
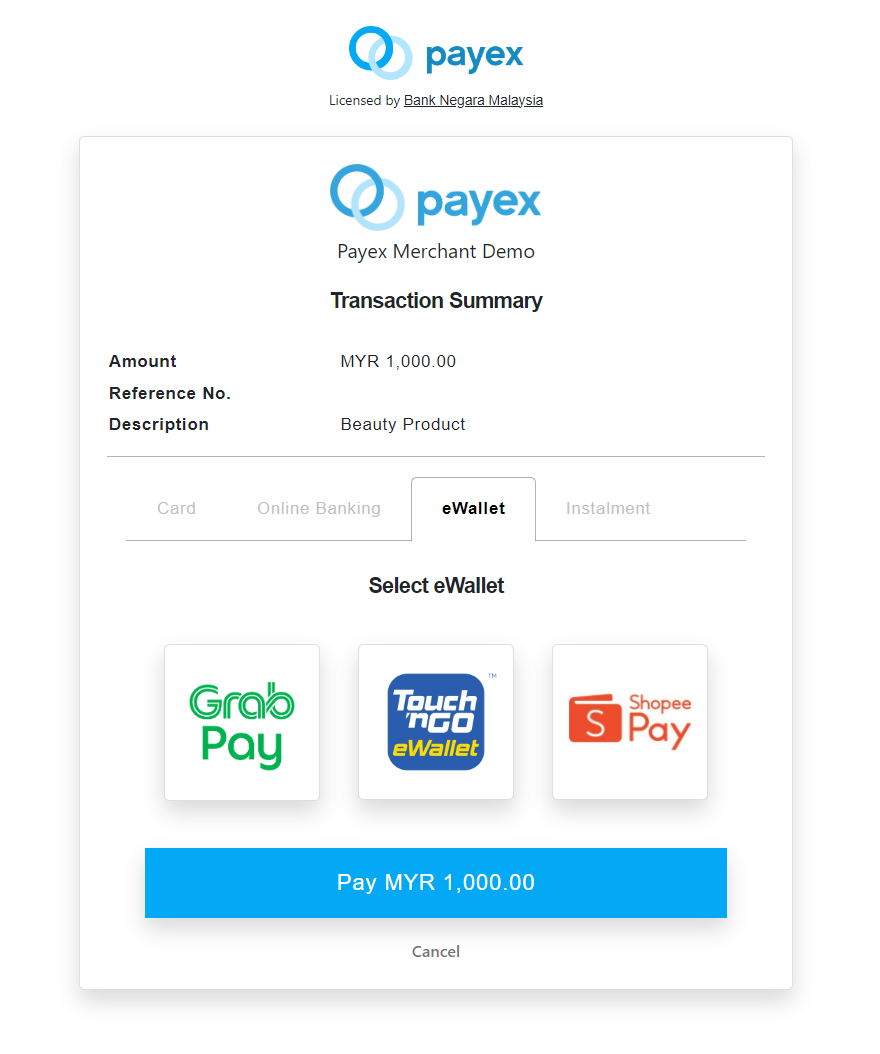
- Upon clicking the link, your customer can select to pay with any payment option, for example Card, FPX, Ewallet and even BNPL instalment such as (Grab PayLater etc)
- Upon successful payment via the link, the collection schedule of that customer will be updated accordingly
API Reference: #
- You may refer to Update Collection Settings Request endpoint to update the collection amount just for a specific period.


