Table of Contents
In order to start exploring our APIs, make sure that you have registered an account with Payex.
To authenticate your account, you have to include your secret API key in the request which can be accessed in the Payex Dashboard. Here are the steps to get authorisation token of your account:
Go to Payex Merchant Portal > Settings > Copy to Secret #

| Parameter | Type | Category | Description | Example |
| Secret | string | required | Use this for access to APIs, and integration with other e-commerce sites and systems (e.g. WordPress, WooCommerce, AdsHelper, EasyStore etc.) | I8W25Imwl1vWVu3KevZGy2fcfAI43Uzp |
Go to Payex API > Select the environment > Click “Authorize” #

Follow Authorization Steps #
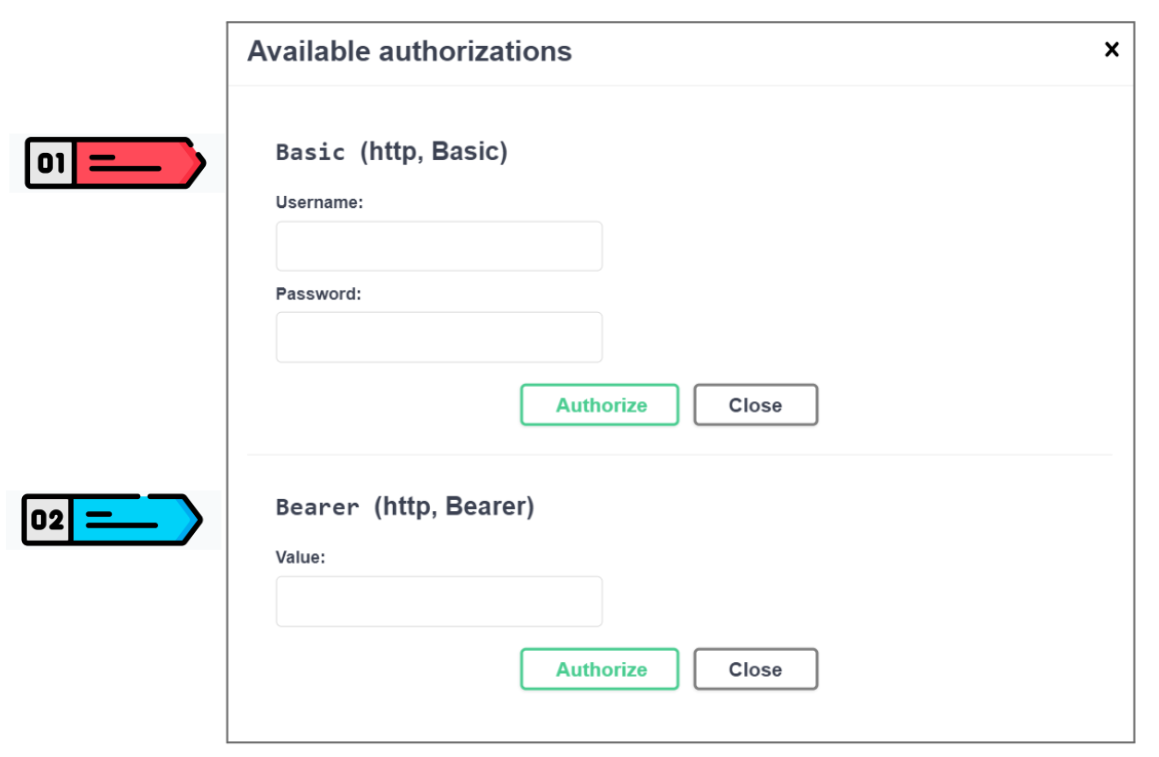
Authentication Step 01: Basic (http, Basic) #
- Under Username, input registered merchant email with Payex.
- Under Password (change to Secret), input Secret from Payex Merchant Portal.
- Click “Authorize” again. The “Authorize” button should be replaced with the “Logout” button.
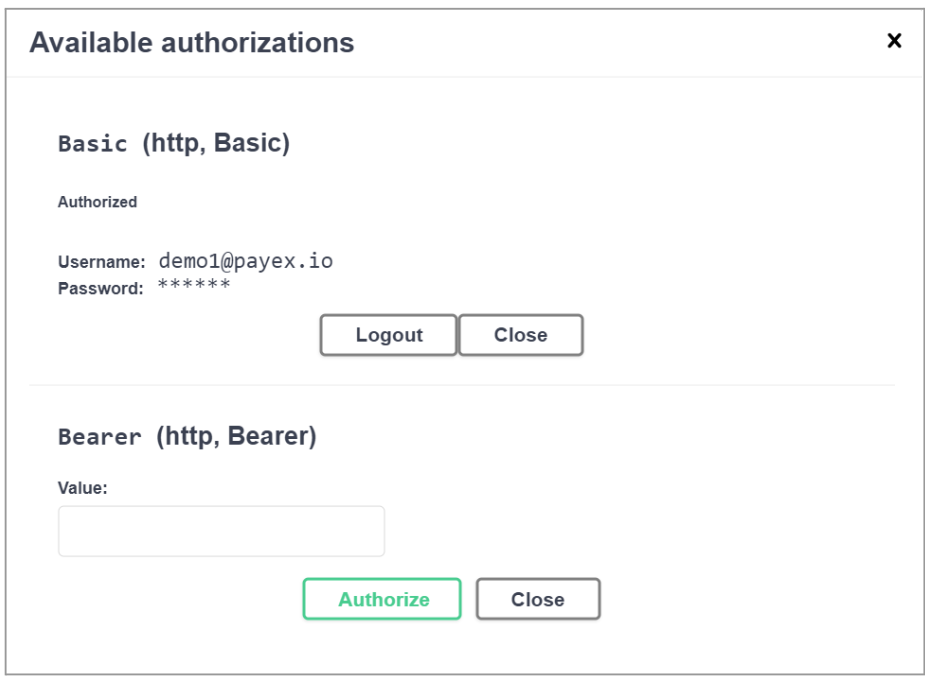
Authentication Step 02: Bearer (http, Bearer) #
- Go to /api/Auth/Token
- Click “Try it out” > Click “Execute” > Access token will be returned
- Copy the Token
- Input the token in the Bearer section under Value in the same Authorize screen.
- Click “Authorize” again
With that, you now have access to the rest of the APIs.
To make it easier to get familiar with Payex Authentication, we’ve published a sample payment flow through Swagger and Postman. Related video:


