Use case: You want to collect a fixed payment from customer once a month, so that monthly collection is automatically done based on the amount and effective date set.

Max Amount: RM500
Frequency: Monthly
Max Frequency: 1
Effective Date: 20th of month
Auto Collection: Enabled
Step 1: Login to Payex’s portal #
Log on to our portal at https://portal.payex.io/Home, and key-in your credentials.
Step 2: Create mandate link #
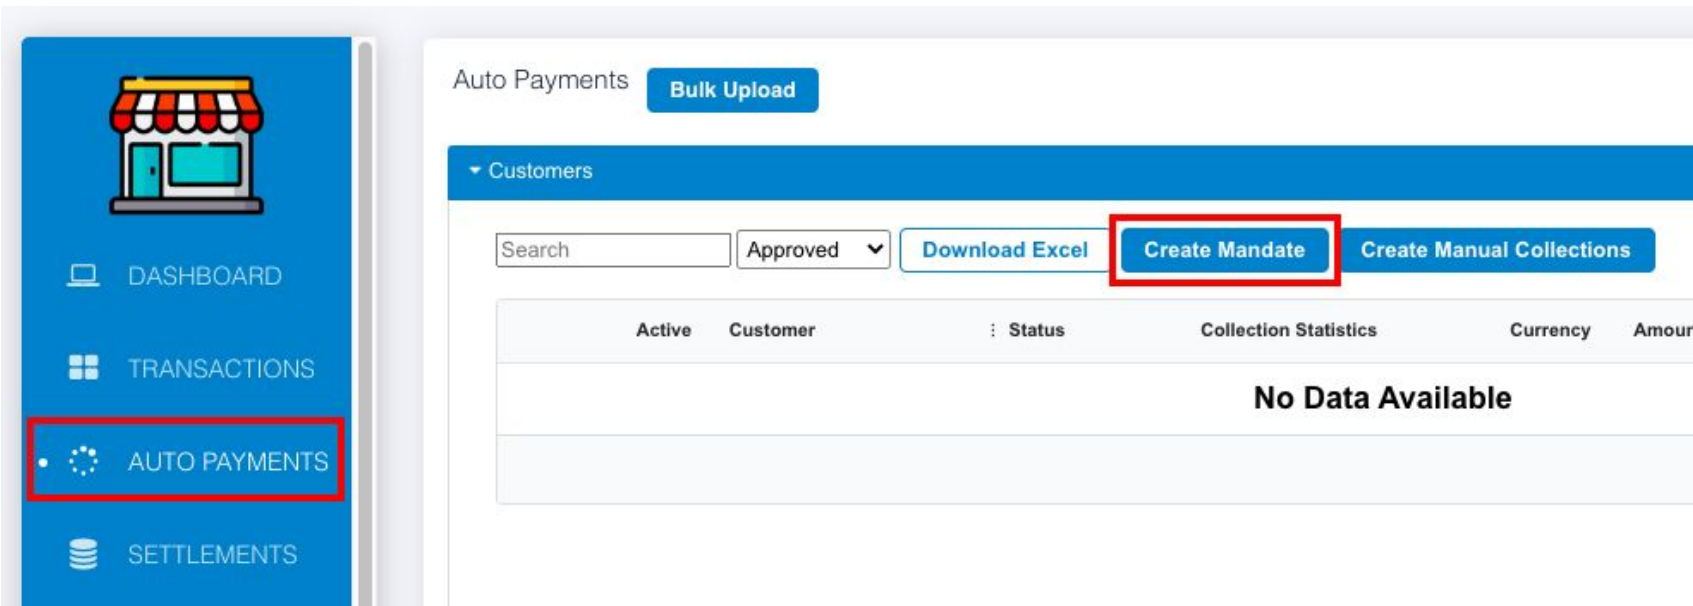
- Click “Auto Payments” on the left panel once you’re logged in.
- Click “Create Mandate“
Step 3: Fill out the mandate application (Part I) #
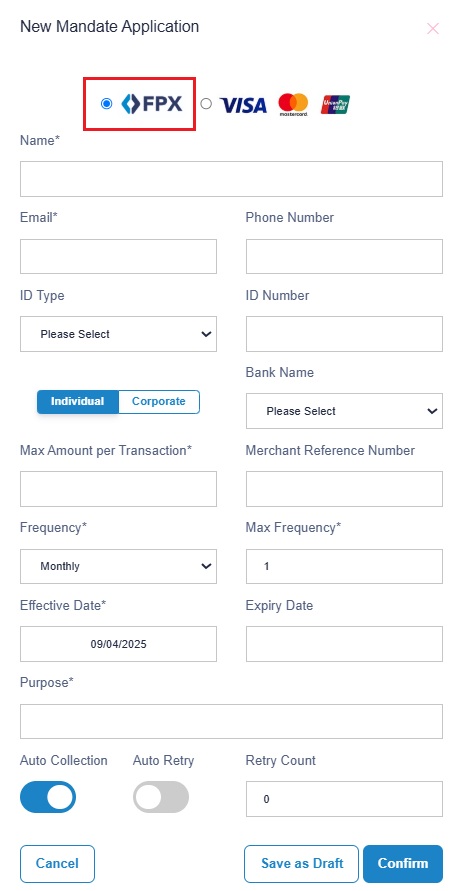
- FPX – link to customer’s bank account
- Fill out the relevant details:
a. Name – customer’s name
b. Email – customer’s email address
c. Phone number – customer’s contact number
d. ID Type – customer’s ID type
e. ID Number – customer’s ID number
f. Bank Name – leave it for your customer to choose
g. Individual / Corporate – leave it for your customer to choose
h. Max Amount per Transaction – the maximum amount you want to charge the customer/amount you want to charge the customer
i. Merchant Reference Number – any reference number you want to put
Step 4: Fill out the mandate application (Part II) #
- Fill out the relevant details:
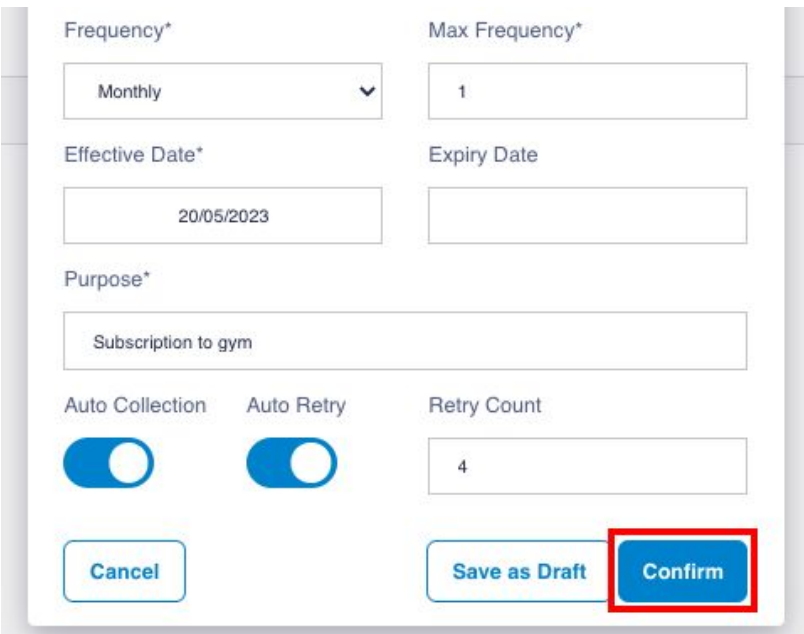
a. Frequency – Monthly (charge monthly). You may also select daily, weekly, quarterly or yearly frequency.
b. Max Frequency – 1 (charge 1 time in a month)
c. Effective Date – 20/05/2023 (collect payment on every 20th)
d. Expiry Date – you may leave it blank if you do not have a date (i.e. if you choose 30/12/2023, the last collection will fall on 20/12/2023)
e. Purpose – purpose of payment
f. Auto Collection – enable it to auto collect every month
g. Auto Retry – enable it to let system auto retry the collection if payment fails
h. Retry Count – 4 (the maximum retry count for system is 4) (i.e. payment failed to collect on 20th, system will retry on 21st, 22nd, 23rd & 24th)
i. Click “Confirm” to generate the mandate link
Step 5: Share the mandate link to your customer #
You will see this screen displayed upon generating the mandate link:
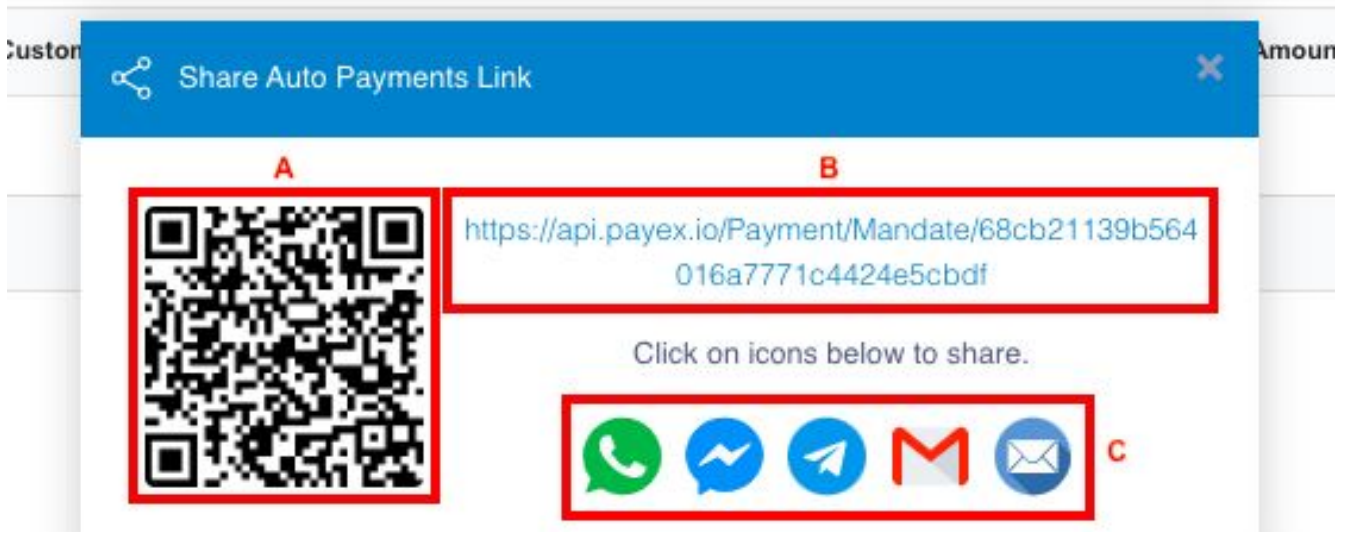
A – right click to save the QR code and share
B – copy the mandate link and share to your customer
C – you can click any icon to share the mandate link to your customer
- Customer clicks the mandate link to fill out the relevant information and click “Proceed”
- There will be a one-time charge of RM 1 (via bank account) for the purpose of account verification and it takes 1 working day to be approved by RHB
- Once it has been approved by the bank then you can start collecting payment from your customers
Step 6: Alter and check the status of your mandate #
Click “Auto Payments“
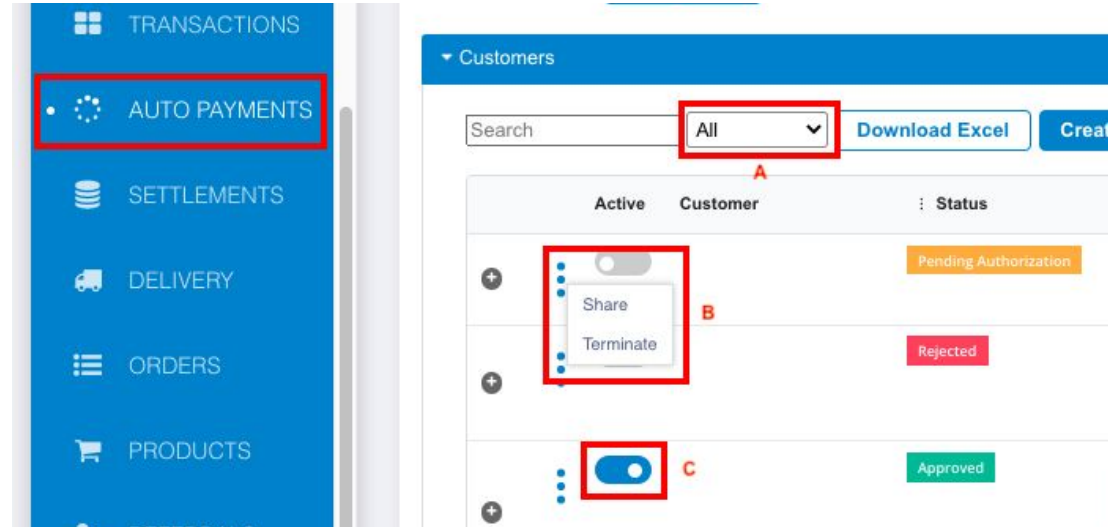
A – can change the filter to “All“
B* – can click “Share” (if you lost it) /
can click “Terminate” your mandate link
C* – can toggle left the button under “Active” column to stop collecting the payment (inactive)
(a) Status: Pending Authorisation – mandate link created but pending authorisation by your customer
- For mandate under status “Pending Authorisation” only, below action can be done:
- Click “Auto Payments“
- A* – can change the filter to “All“ to look for all types of status for all transactions
- B* – can click “Share” (if you lost it the mandate link) / click “Terminate” your mandate link (will permanently terminate the mandate and can’t be reactivate again. If want to reactivate, your customer needs to authorise mandate again)
- C* – can toggle left the button to pause collecting the payment (your mandate will become inactive and stop collecting for the next cycle, until you activate it back).To active back, you can always toggle right to activate again, then your customer won’t need to authorise mandate again.
(b) Status: Approved – mandate link created, authorised by your customer and verification approved by the bank
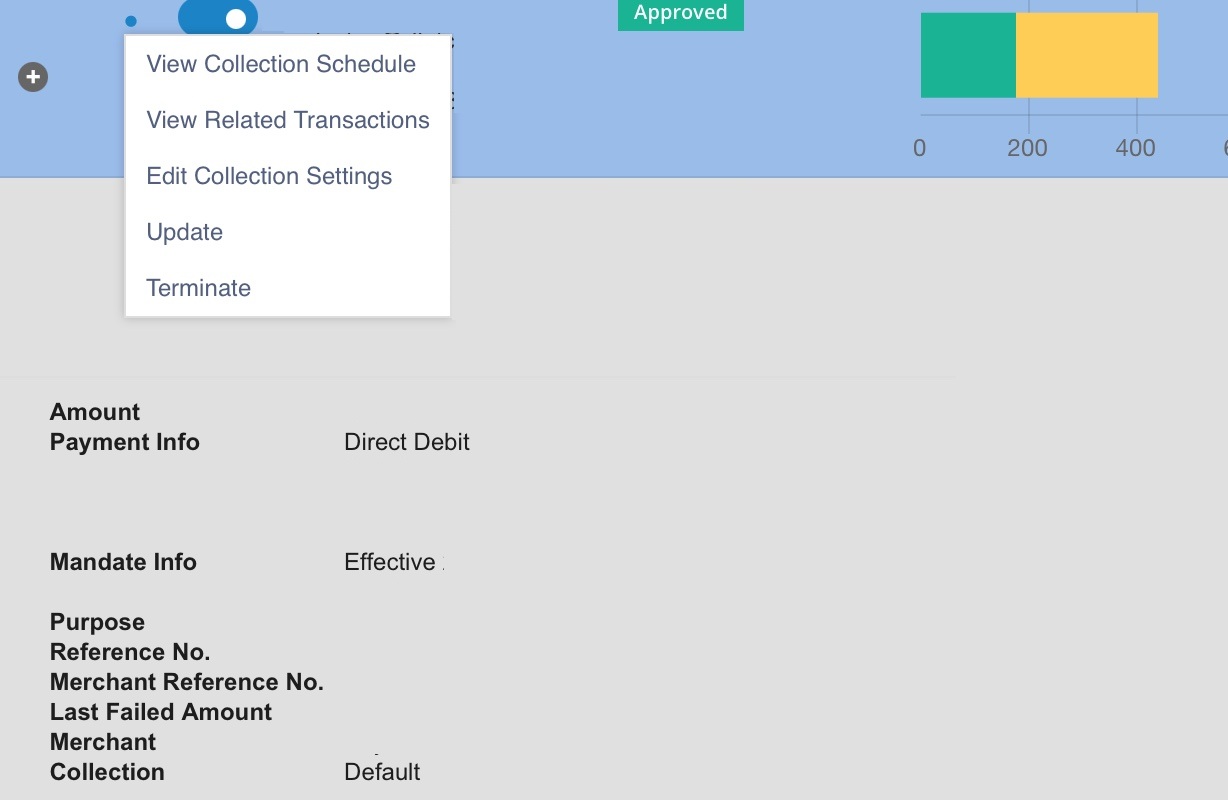
- For mandate under status “Approved“:
- You may see the collection schedule of the mandate by click on “View Collection Schedule“
- You may see your transaction ID no. by clicking on “View Related Transactions“
- You may click “Terminate” your mandate link (will permanently terminate the mandate and can’t be activate again. If want to reactivate, your customer needs to authorise mandate again)
How to do: At the Auto Payments dashboard, select the mandate > click on the 3-dots icon > click “Terminate” > a new link will be generated, please copy and share this termination link to your customer (for them to click for official termination of the mandate) - You may toggle left the button to pause collecting the payment (your mandate will become inactive and stop collecting for the next cycle, until you activate it back).To re-activate, you can always toggle right to activate again, then your customer would not need to authorise mandate again.
(c) Status: Rejected/Invalid – mandate link created, authorised by your customer but failed to verify by the bank
Please inform your customer to check with their bank on the rejection


