Step 1: Login to ezbeli’s self-service portal #
- Click “Login” button at https://ezbeli.com.my/my-account/
- Login using your existing credentials

- For first-time login, don’t forget to reset your password by clicking “Forgot Password” at the login page
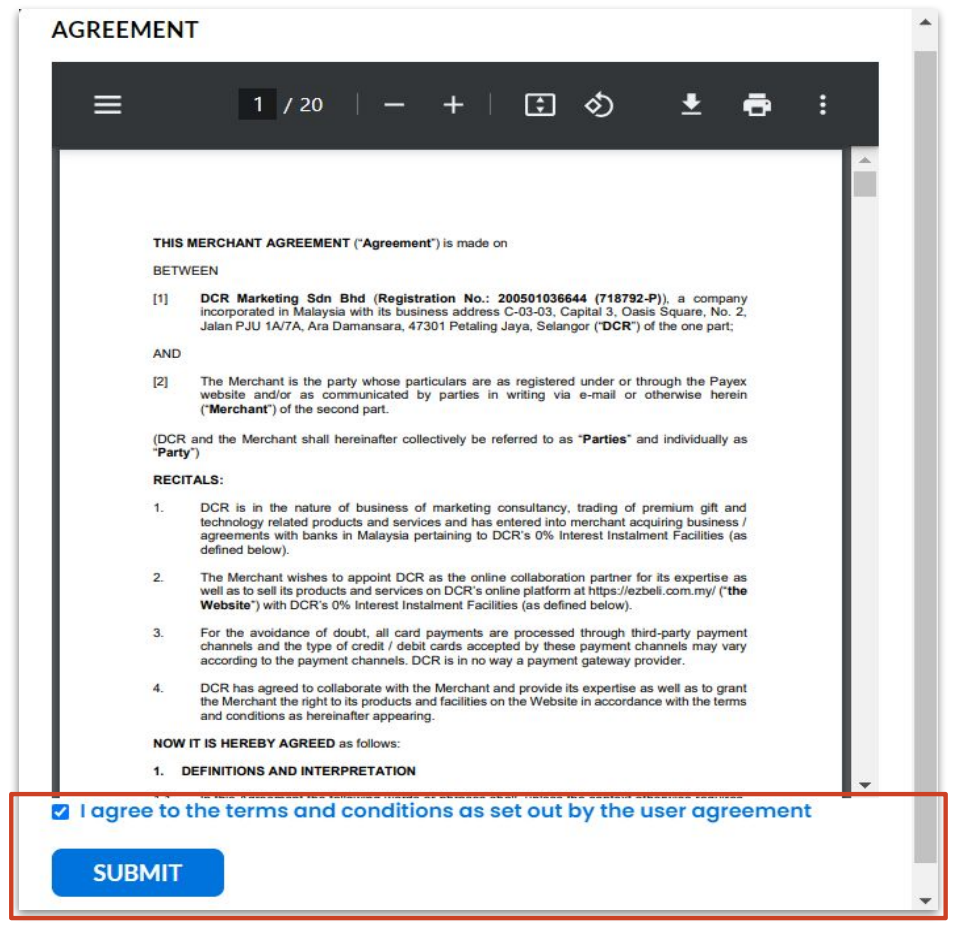
- For first-time login, you will need to check the box to indicate agreement to T&C set out by the user agreement
Step 2: Add product and fill out the product details #
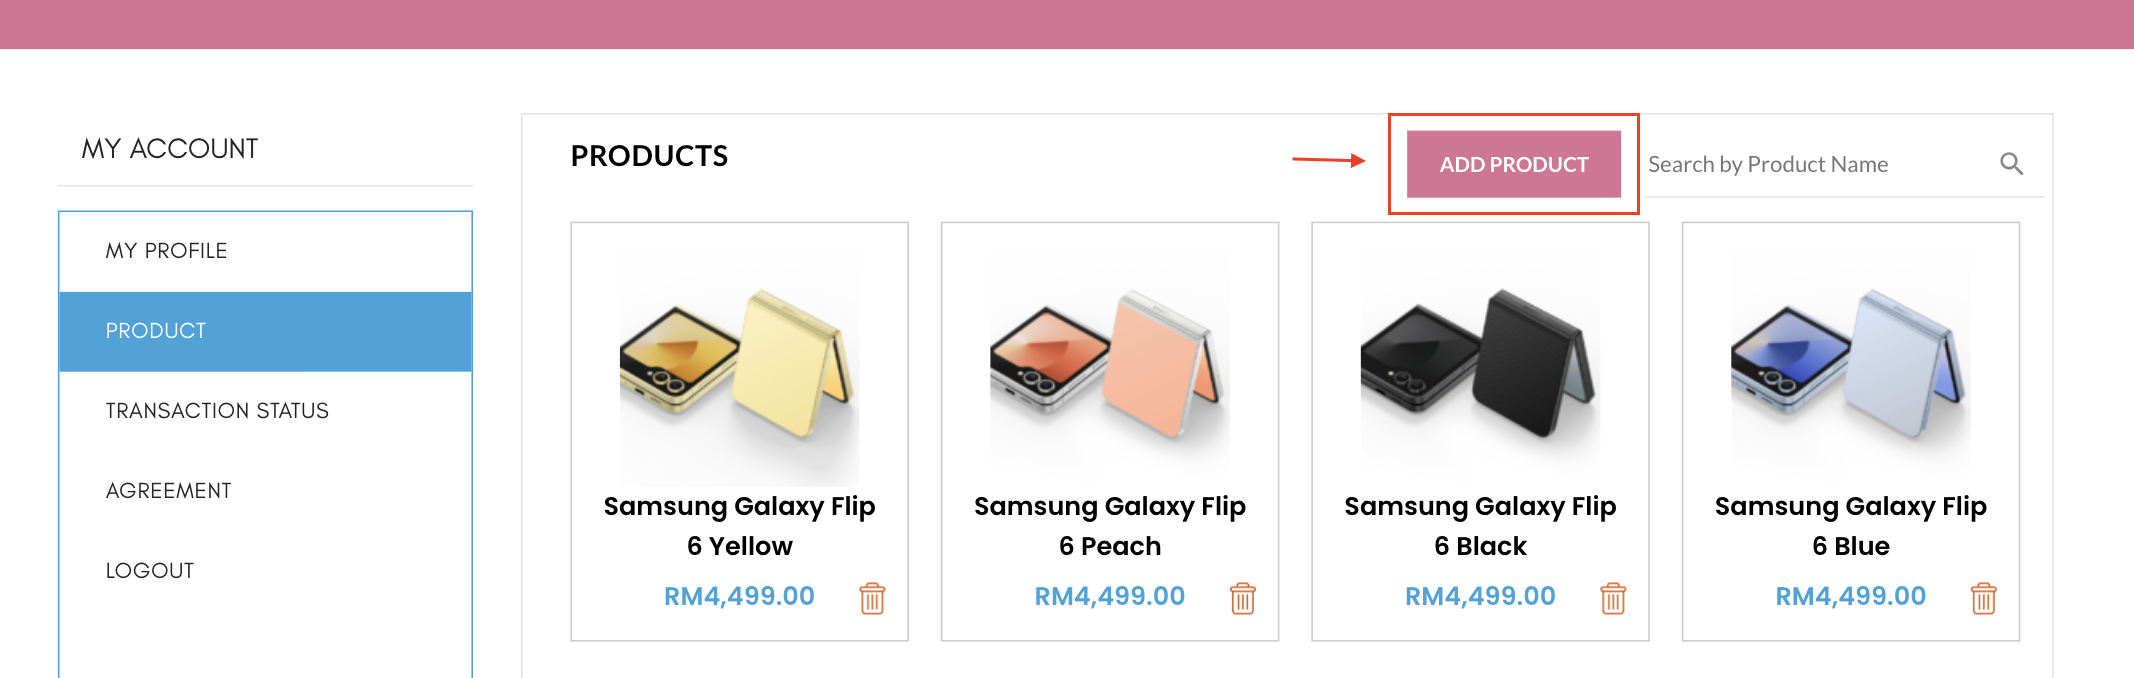
- Go to “Product” tab.
- Click “Add Product”
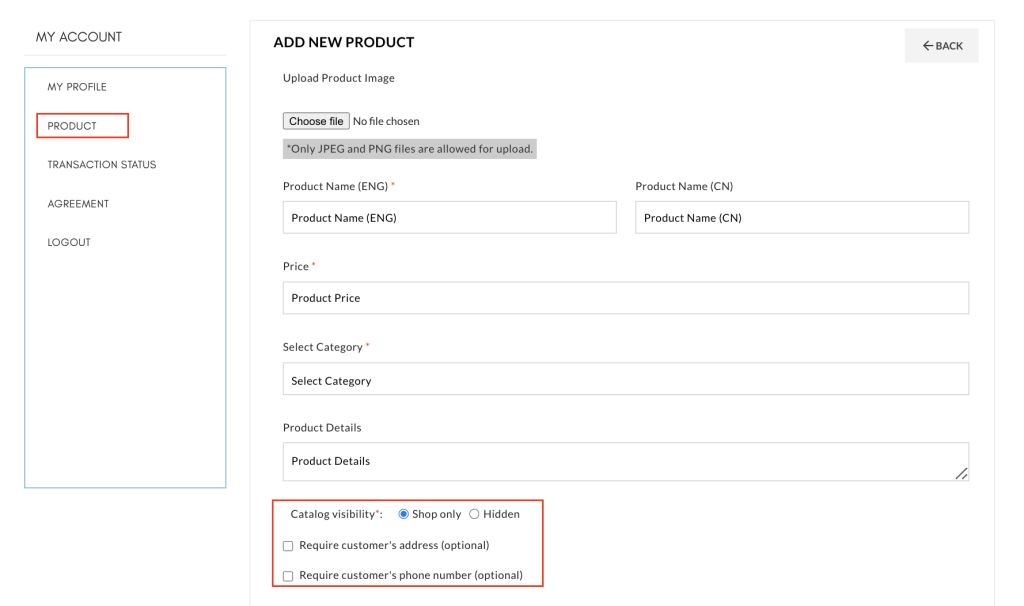
- Upload Product Image is optional (Required resolution: 700px X 800px)
- If no image has been uploaded, the default product photo will be the store logo
- Fill out payment details
- Catalogue visibility is default set to “Hidden” which means the product will not be accessible by public
- Check the box if you require customers to fill out their address (optional) or phone number (optional) when they click the link
You can now share your Ezbeli QR Code for customers to scan, checkout & pay
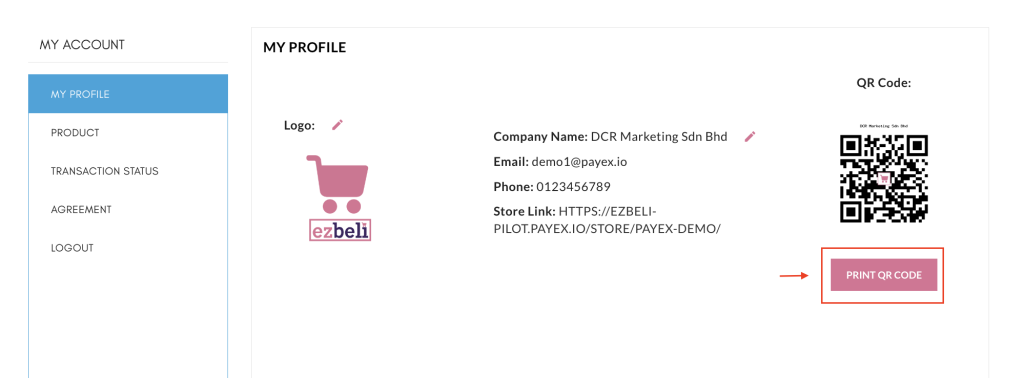
- Publish your products on your Ezbeli Store for Checkout via QR Code by:
- Upload Product Image is required (Required resolution: 700px X 800px). If no image is uploaded, the store logo will be used instead
- Set product catalogue visibility to “Shop only” (Please note: products that are set to hidden will not show on your store)
- Click PRINT QR CODE to generate your store QR
- Click Save to download the QR PDF file to your device
- Print the QR code if physical copy is needed
- Customer may scan the QR code, add product to cart and pay via credit card instalments

- Preset your customer preferred bank/tenure for each product link
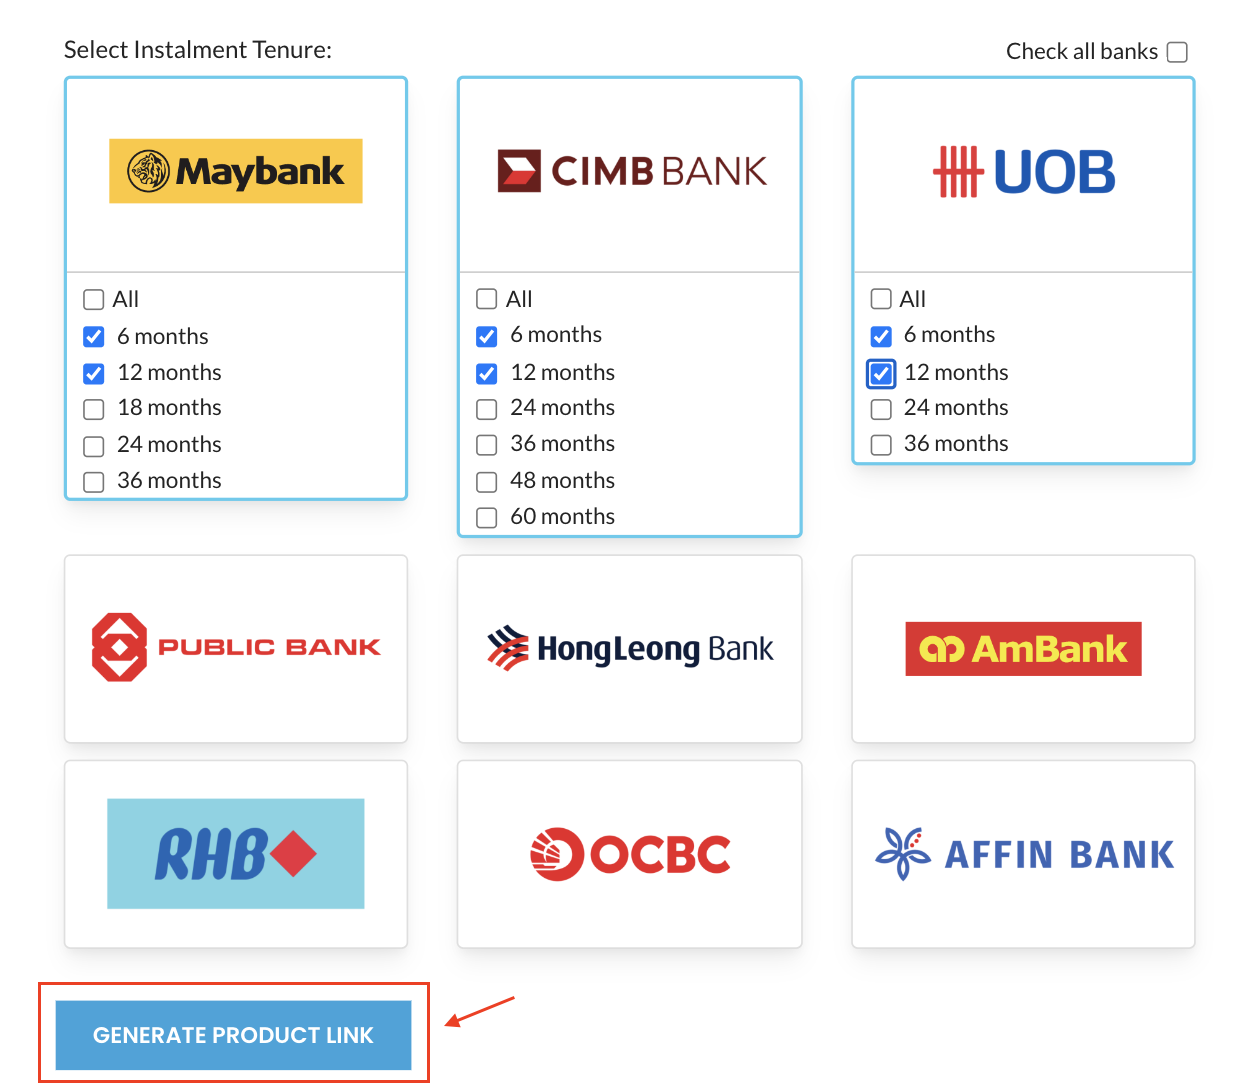
- Click “Generate Product Link”
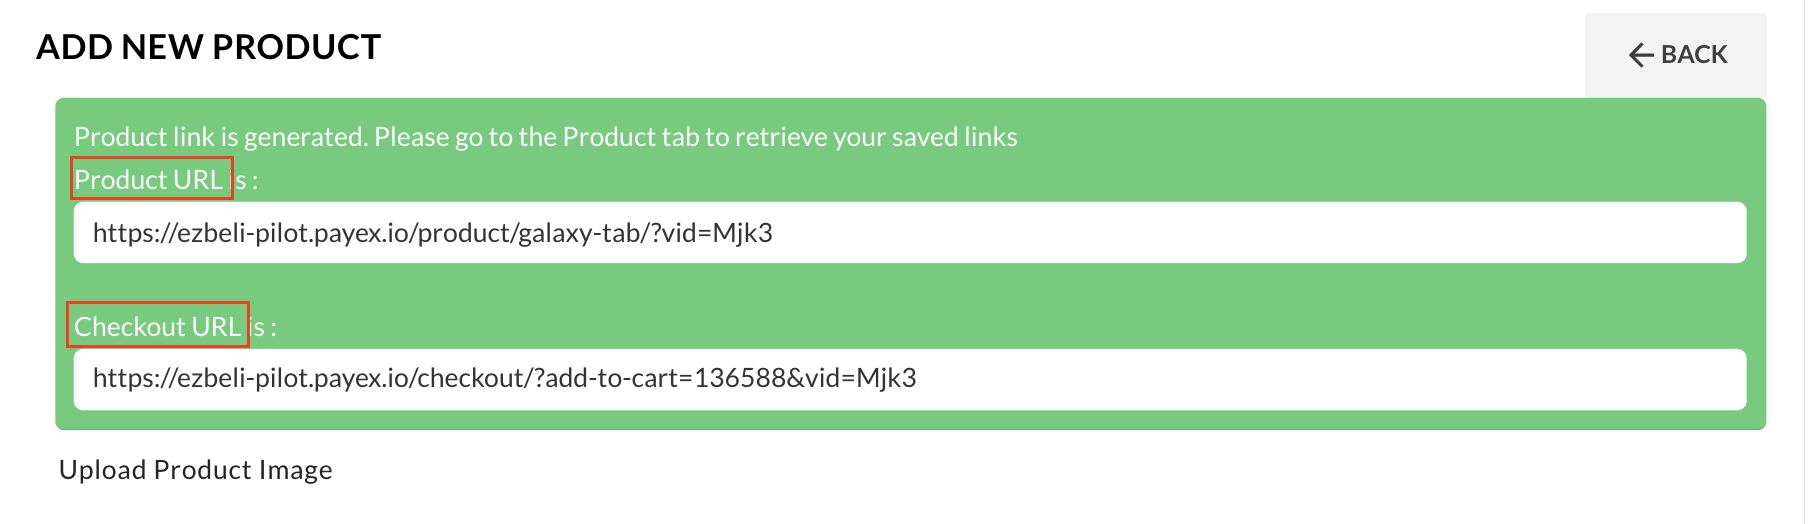
2 types of product links will be displayed, you may choose the one preferred:
- Product URL – a link where your customer can view product image, change quantity and add to cart before proceed to checkout
- Checkout URL – a link where your customer can proceed to fill out basic details and pay directly
Step 3: Share product link #
- You may click the “Copy” icon to copy the product link (Product URL / Checkout URL) and share to your customer
- If you happened to lose your product link, you may retrieve it under the “Product” tab

Edit product >> #
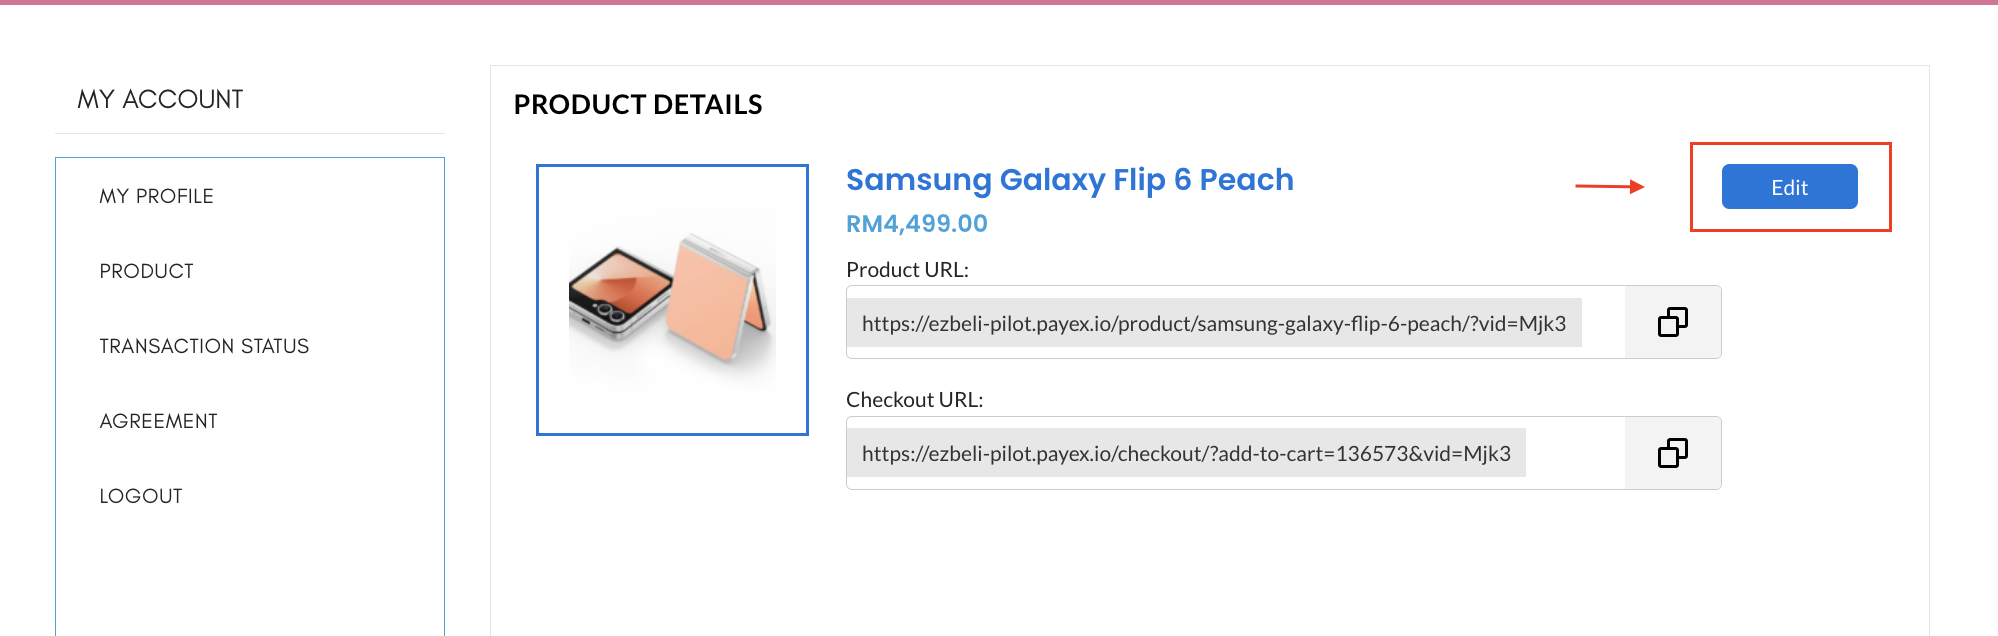
- Click the ‘Edit‘ button to make changes to the product previously added
Delete product >> #
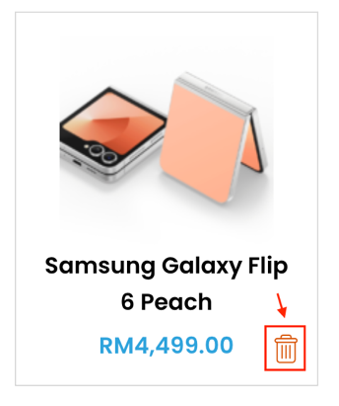
- Click the ‘Trash Bin” icon to delete the product added from your merchant account
Step 4: Monitor transaction status #
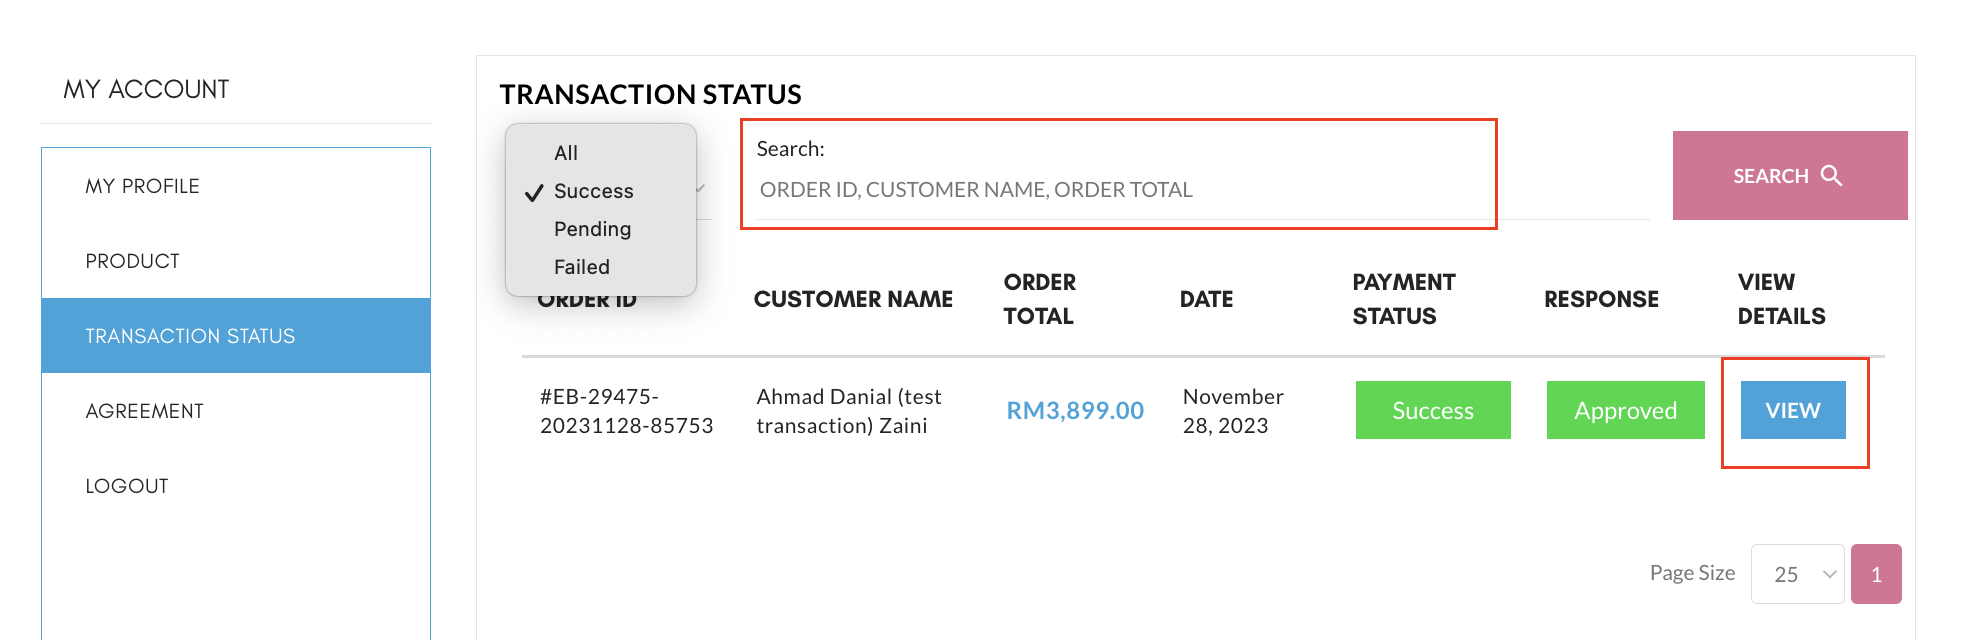
- Click “Transaction Status”
- Click “View” to view additional customer details and order details
- Transaction status –
- Pending – Customer did not proceed to pay after clicking “Pay with Payex” or did not complete filling out the payment details
- Success – Payment successful
- Failed – Payment failed
❗ Note:
1. You can also check the transaction status from merchant’s Payex’s portal
2. However, only “Success” / “Failed” payment status would show up on the merchant’s Payex Portal
Step 5: Notification on new order and payment notification from customer #
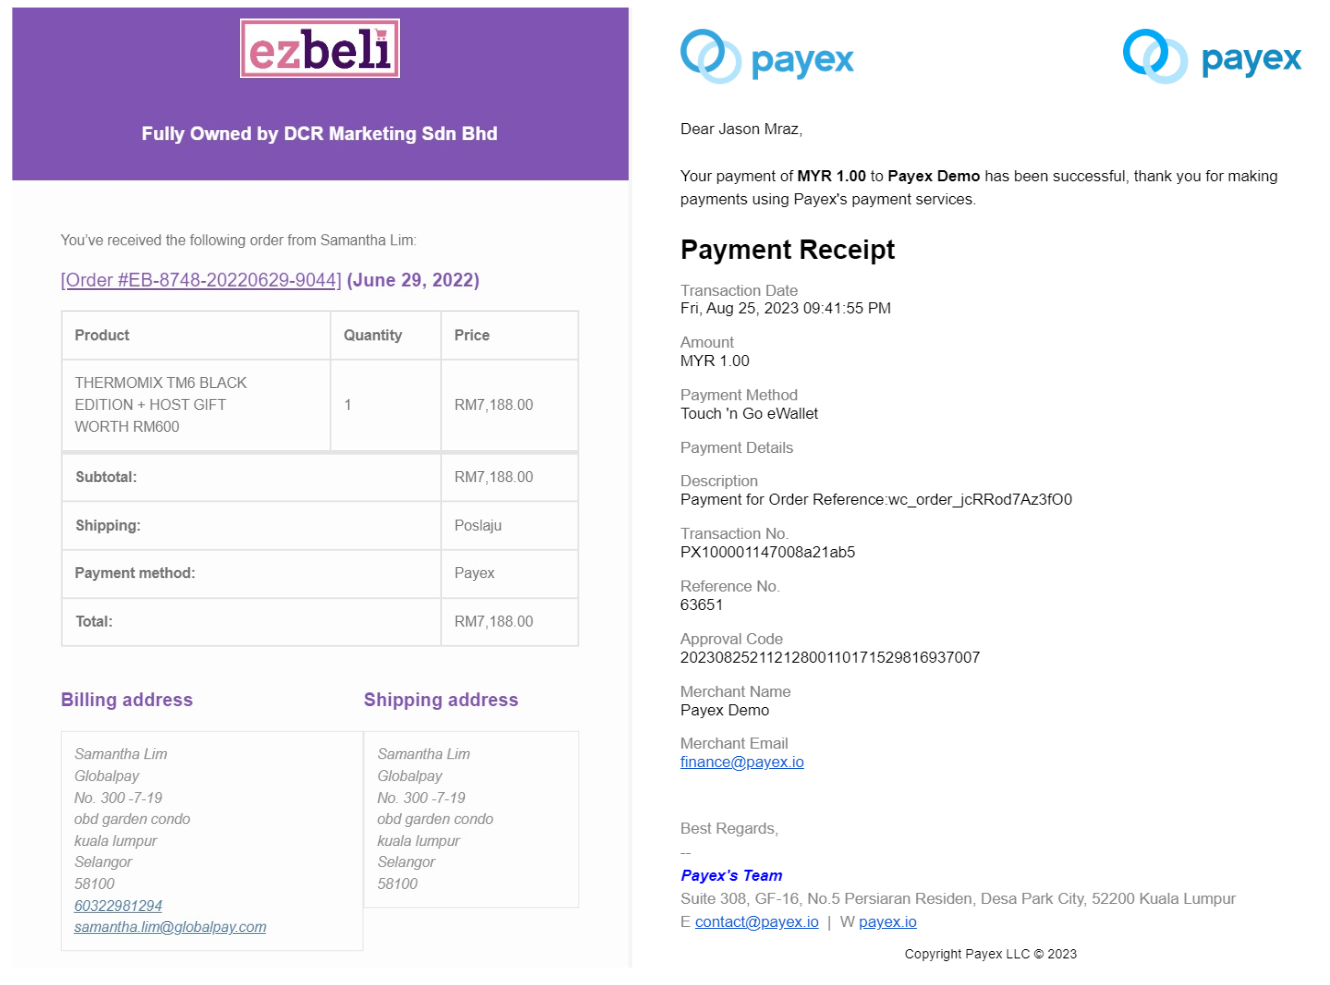
- You will receive email notification from Ezbeli for every new order
- You will receive payment notification from Payex (via contact@payex.io) for every successful payment by your customer
Step 6: Payex portal transaction monitoring #
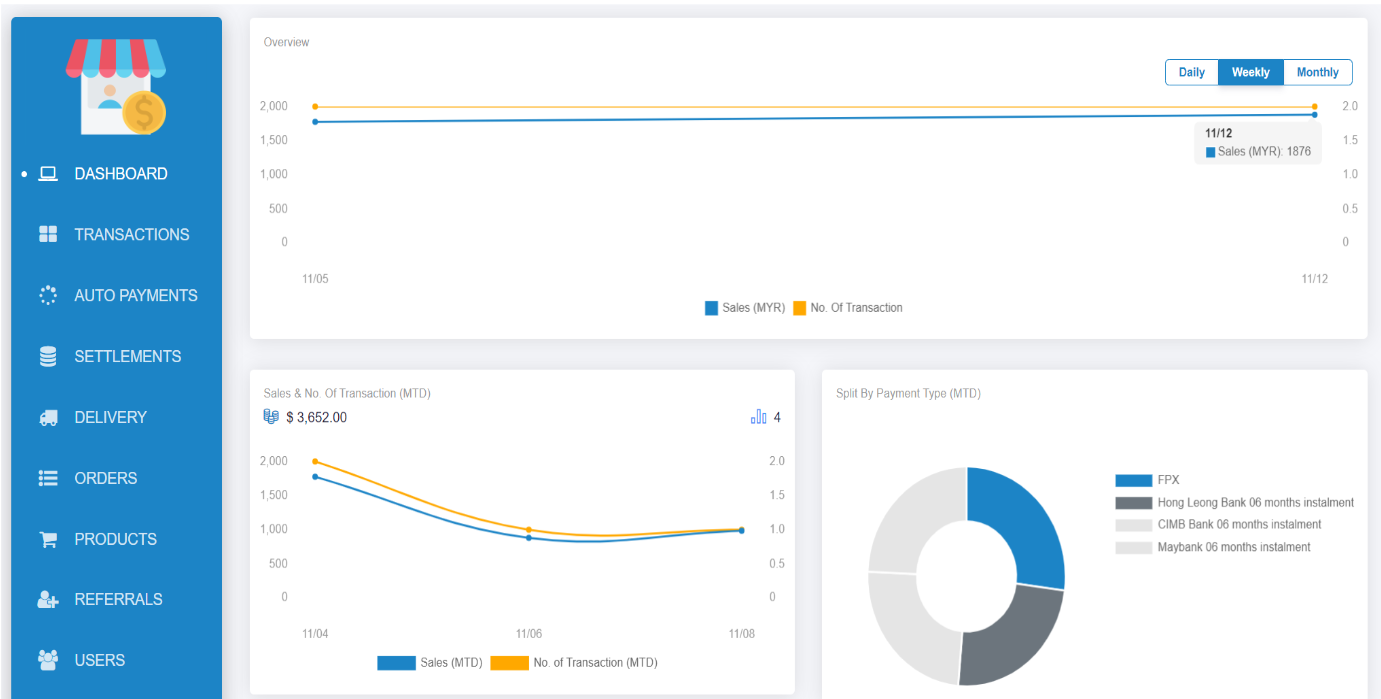
- Login to your Payex Portal
- You get to monitor your transactions on Payex Portal > Click “Dashboard” at the side bar
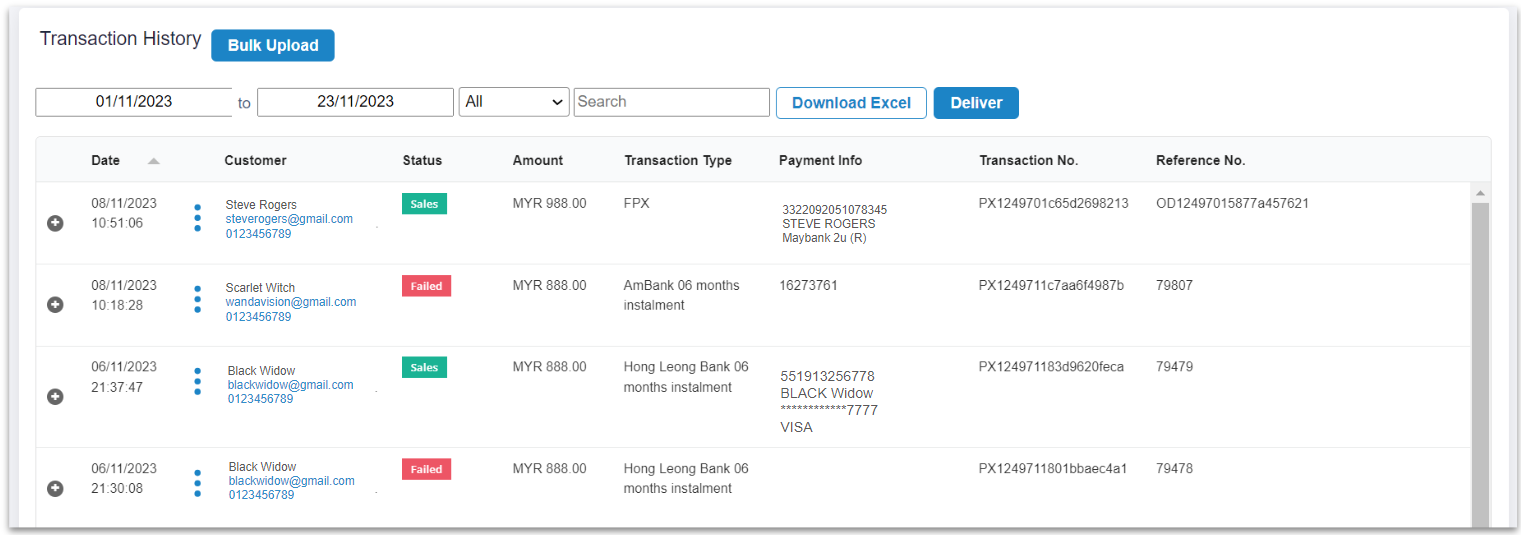
- You get to monitor your detailed transactions on Payex Portal > Click “Transactions” at the side bar
- You may also download the transactions in Excel for tracking purpose
What to take note of: #
- You may refer to our customer journey guide here on How to pay via Credit Card Instalment link
- As per bank industry practice for credit card instalment payment plans, customer is able to track transaction on their monthly credit card statement. Refer here for example


